Usare l'operatore virtuale per gestire le prenotazioni
Vogliamo aiutarti ad assistere i viaggiatori. Per questo abbiamo progettato un operatore virtuale con intelligenza artificiale che ti permette di:
Gestire le prenotazioni di alloggi con facilità
Verificare rapidamente lo stato del rimborso di una prenotazione
Aumentare la tua efficienza, grazie alle opzioni di assistenza in autonomia accessibili dalla pagina dei viaggi o degli itinerari
Inoltre, grazie all'apprendimento automatico, l'operatore virtuale migliora continuamente e amplia le sue capacità di supporto tramite la chat.
1. Vai alla sezione I miei viaggi
La sezione I miei viaggi si trova nella barra superiore della home page di Expedia TAAP.

2. Clicca su Supporto
Nell'angolo in basso a destra vedrai il pulsante per la chat. Cliccaci sopra per aprire l'interfaccia della chat e avviare la conversazione con l'operatore virtuale. Se non lo vedi, può darsi che l'operatore virtuale non sia ancora disponibile nella tua lingua. Prova a passare alla versione inglese del sito per aprire la chat.
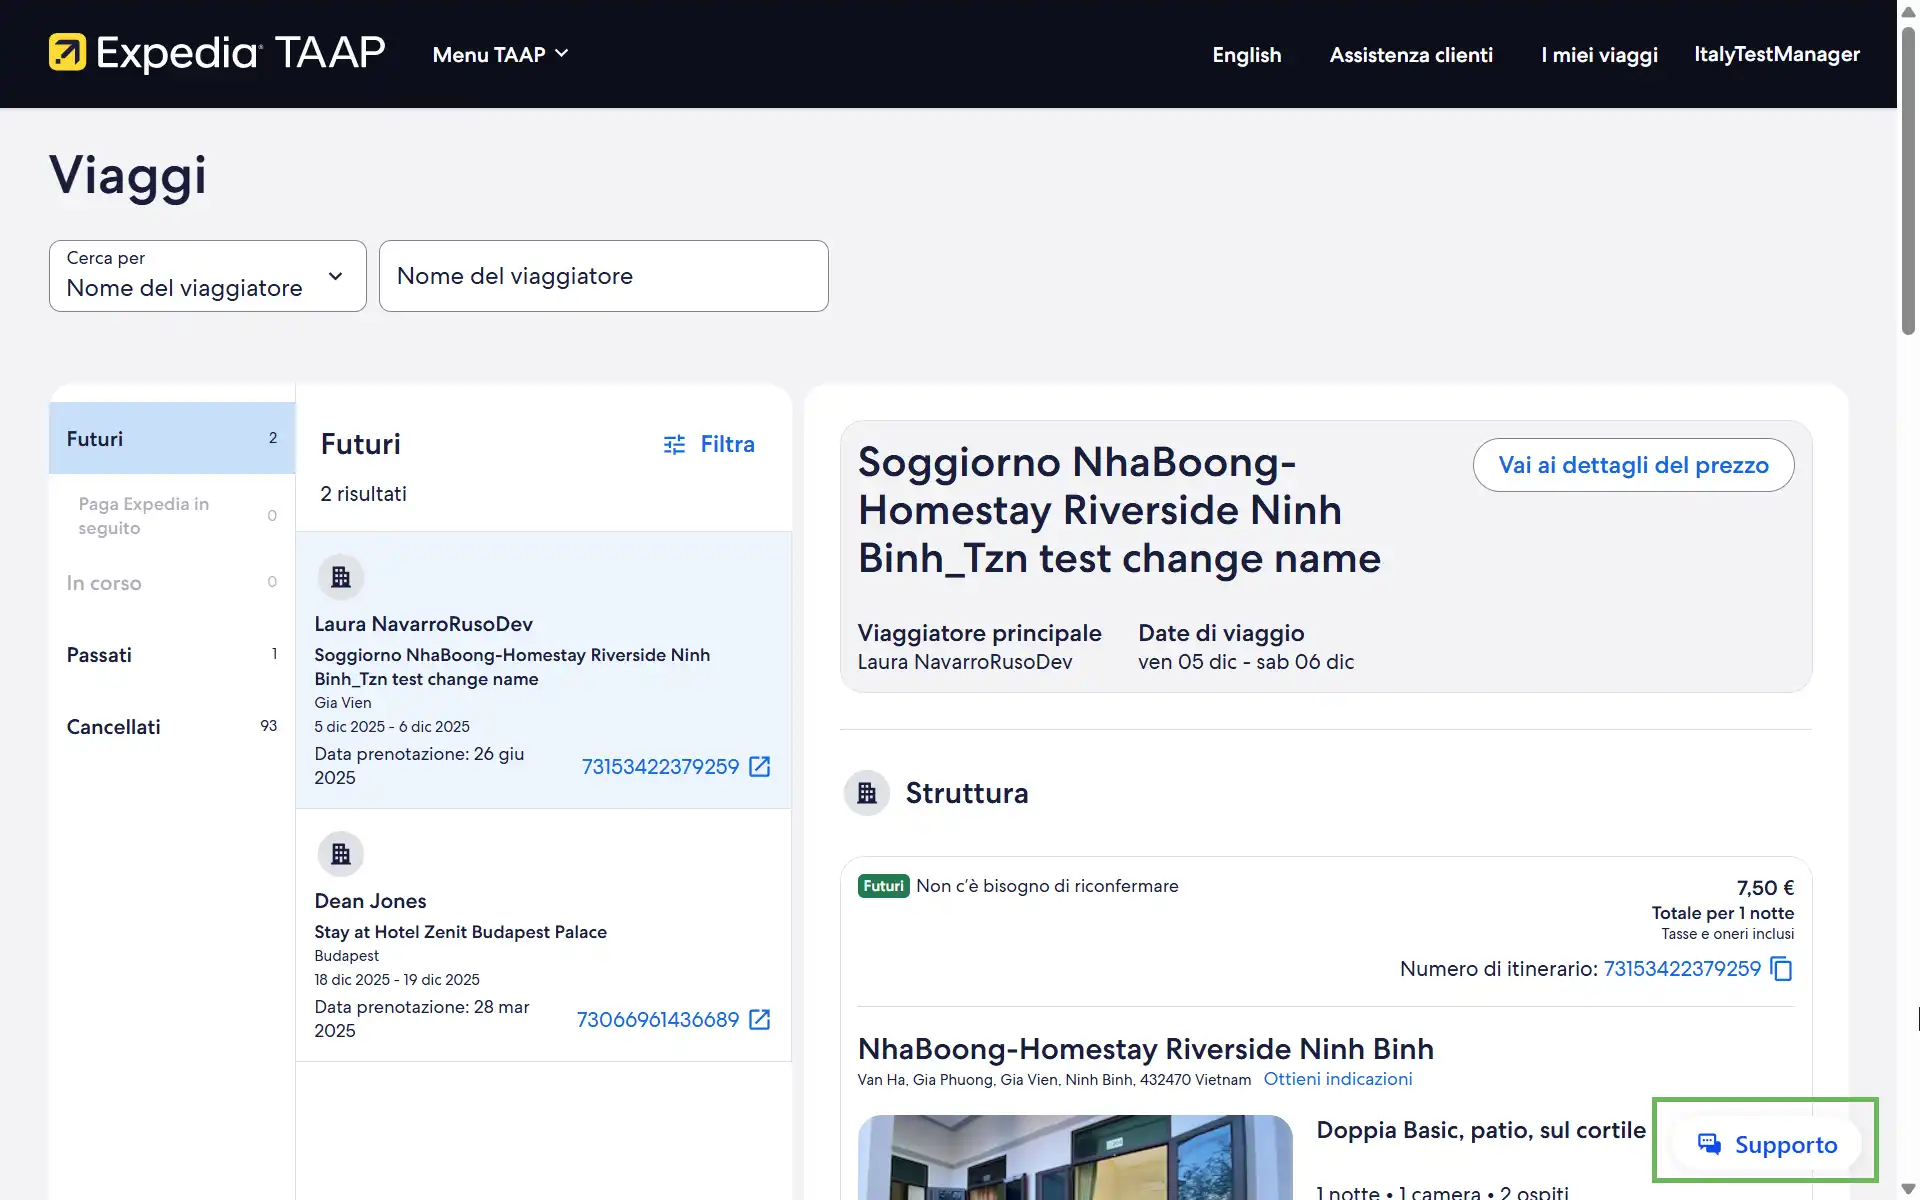
Puoi anche accedere all'operatore virtuale da altre pagine, come quelle degli Itinerari o dell'Assistenza clienti (vedi esempio qui sotto).
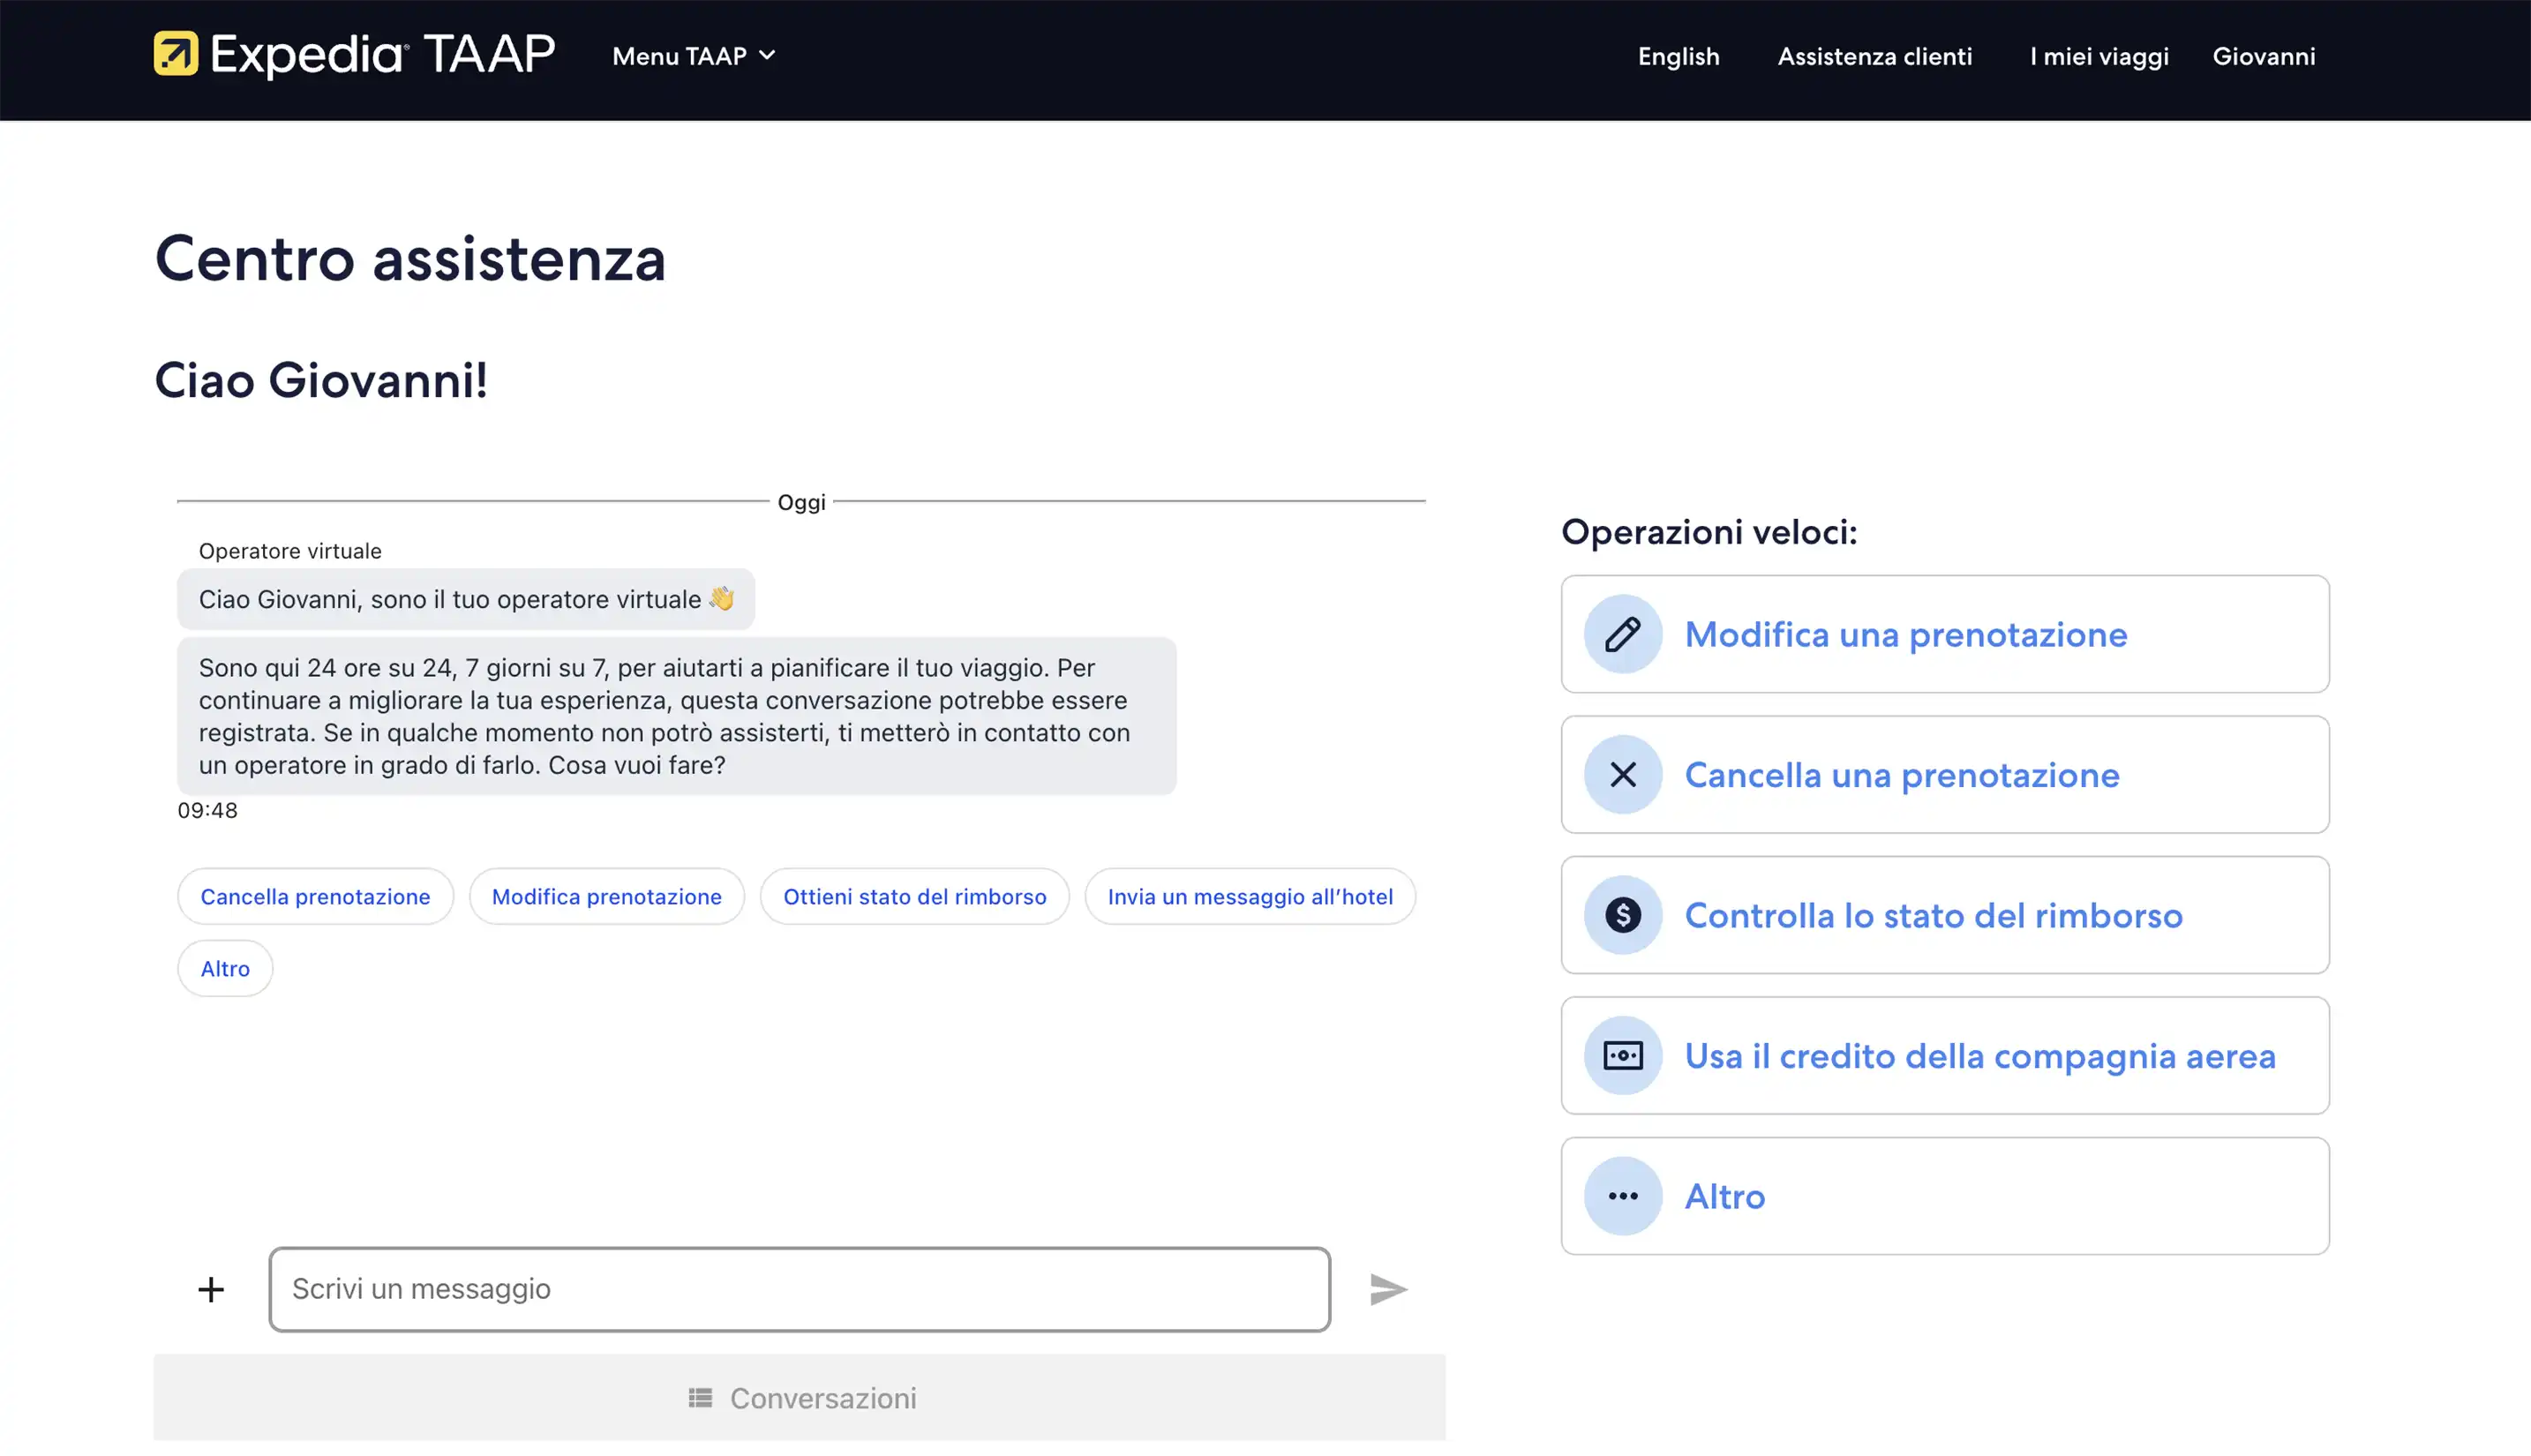
3. Interagisci con l'operatore virtuale
Cliccando sul pulsante della chat puoi iniziare a interagire con l'operatore virtuale, che ti presenterà automaticamente una sequenza con le tue prenotazioni future, in modo che tu possa sceglierne una rapidamente. Puoi cliccare su Passati e cancellati e selezionare un itinerario precedente, per verificare lo stato del rimborso della prenotazione. Inoltre, puoi accedere all'operatore virtuale da altre pagine, come quelle degli itinerari o dell'Assistenza clienti (vedi esempio qui sotto).
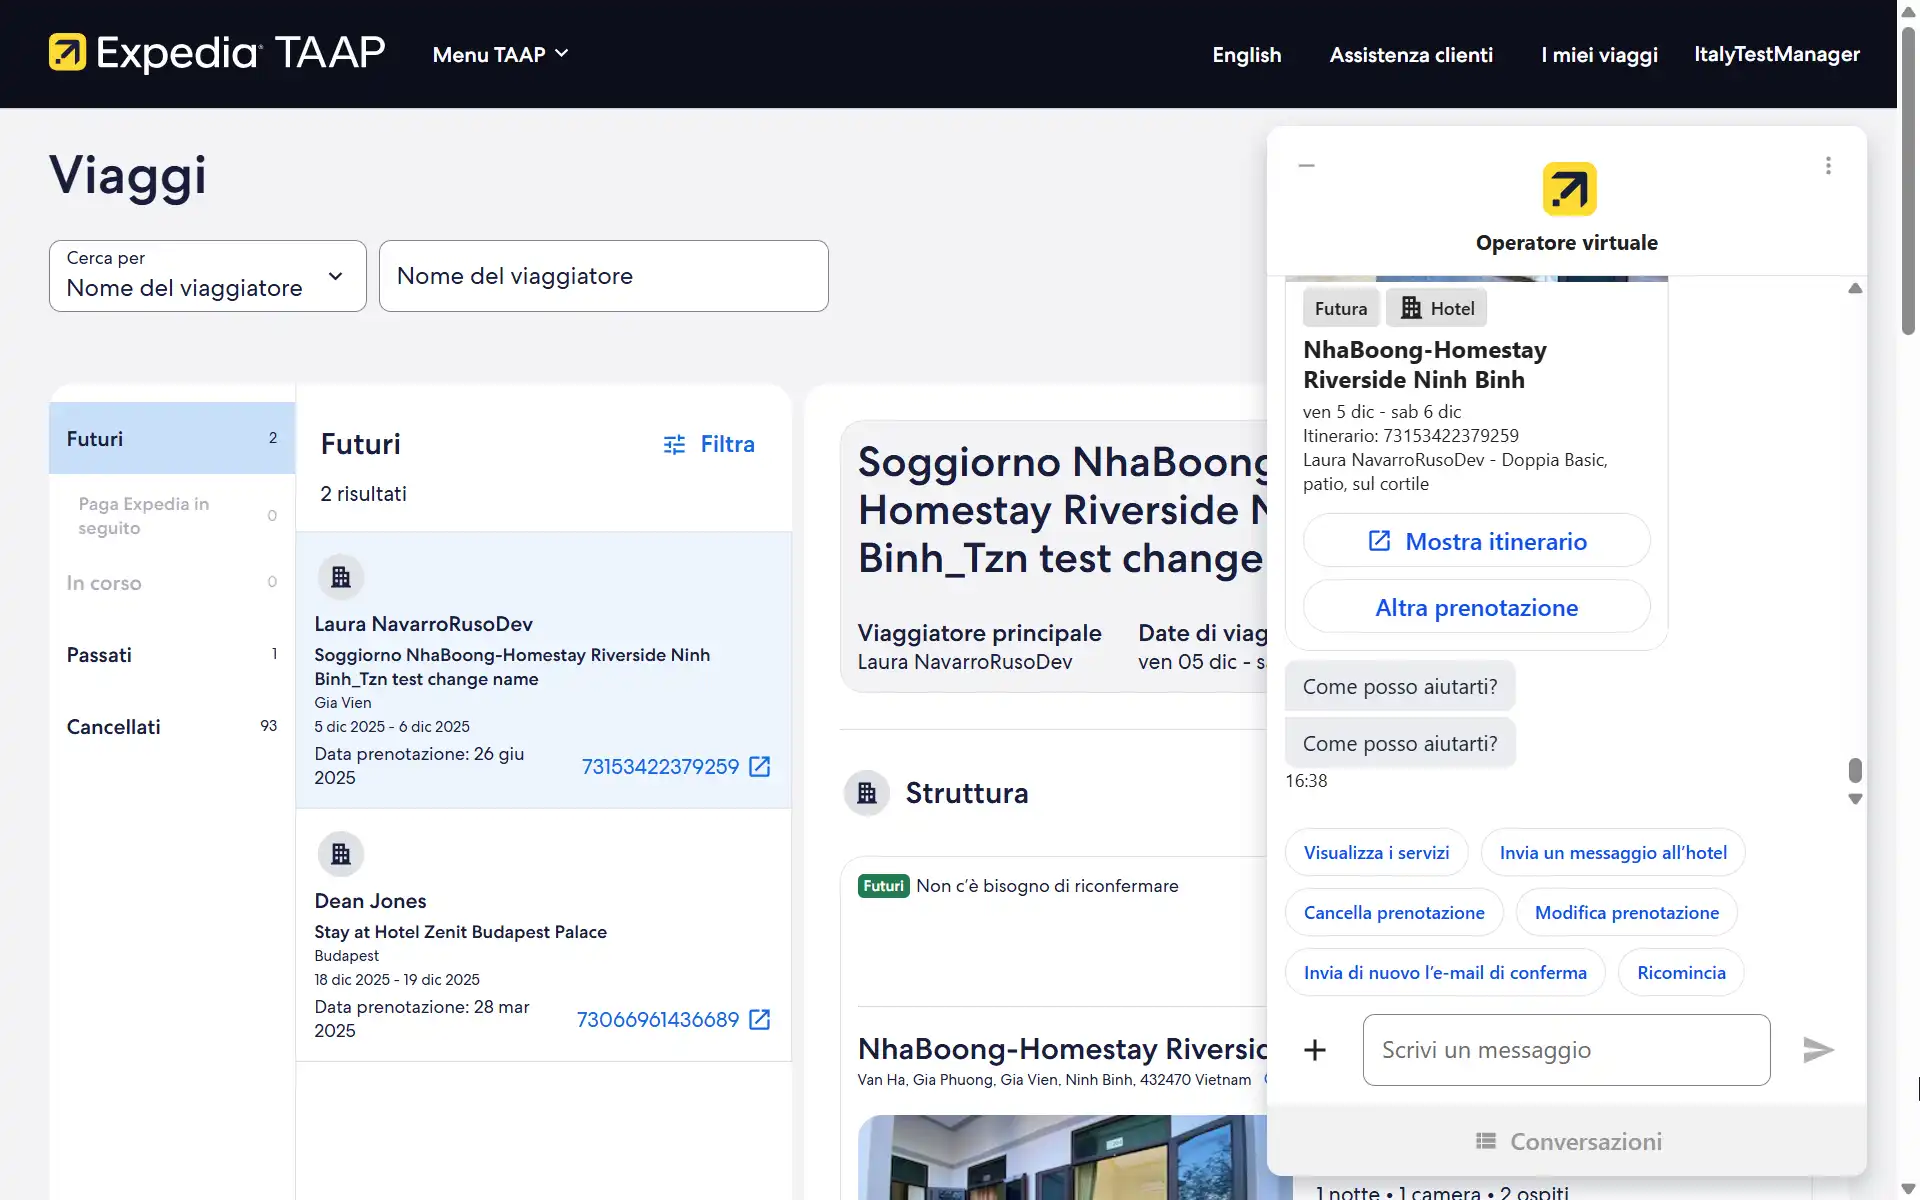
Usa l'operatore virtuale:
L'operatore virtuale è molto intuitivo. Devi solo seguire le istruzioni e indicare cosa ti serve. Ti risponderà e cercherà di aiutarti nel miglior modo possibile. Se l'operatore virtuale non può aiutarti (sta ancora imparando e migliorando le sue capacità) ti darà il numero di telefono da chiamare per richiedere assistenza. Oppure, digitando "parla con un operatore", ti metteremo in contatto con un operatore dal vivo tramite la chat.
Nel seguente esempio, vogliamo modificare una prenotazione futura presso Pondok Denayu Homestay, perché i viaggiatori vogliono soggiornare una notte in più.
1. Seleziona la prenotazione e clicca su Modifica prenotazione
Dopo aver selezionato la prenotazione, scegli una delle opzioni disponibili, in questo caso Modifica prenotazione.
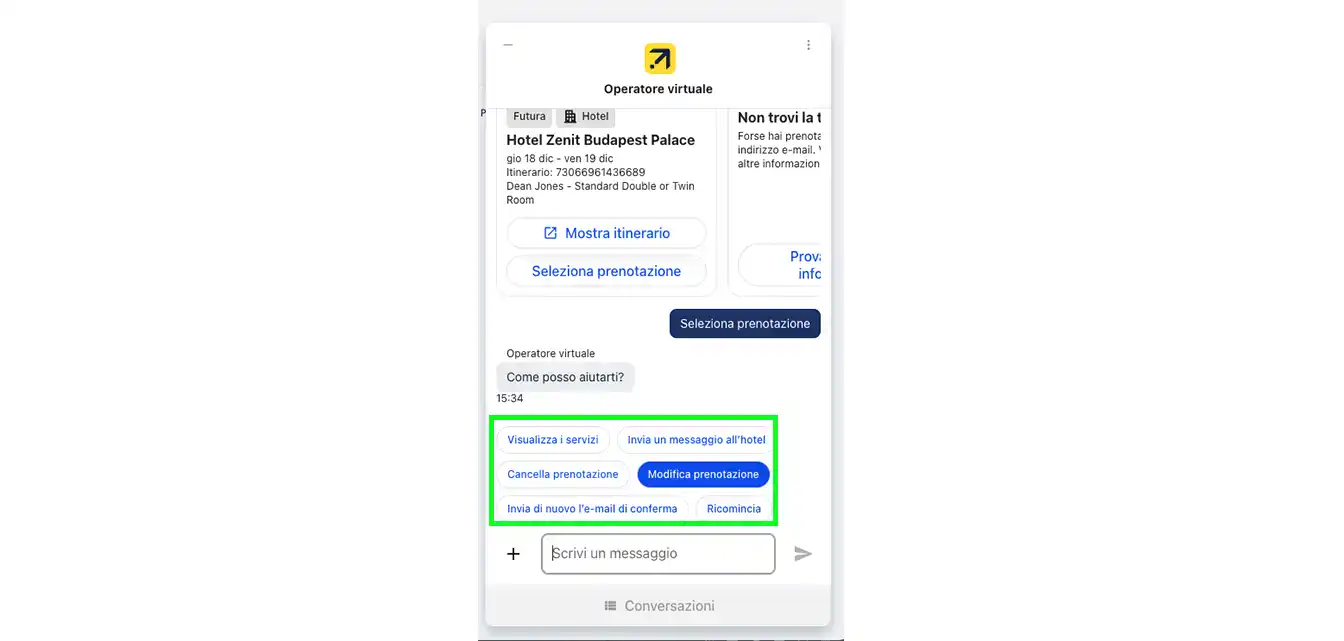
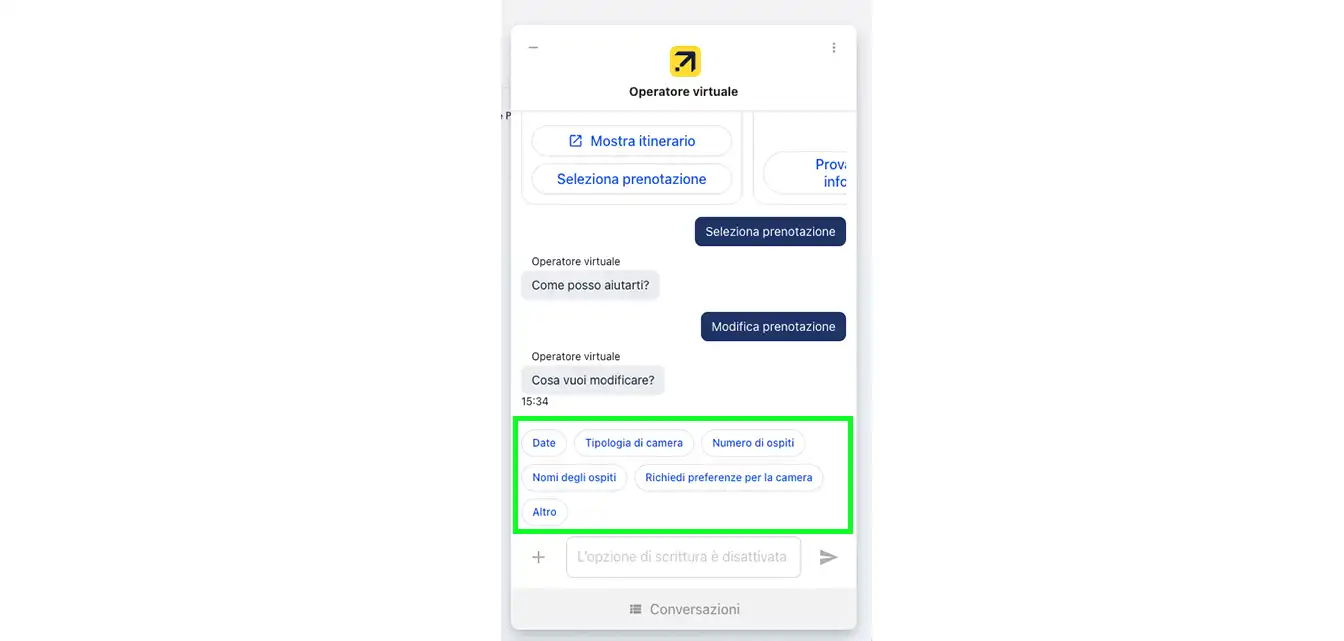
2. Seleziona i dati da modificare
L'operatore virtuale ti chiederà cosa desideri modificare. Dato che vogliamo aggiungere una notte in più, seleziona Date dalle opzioni disponibili.
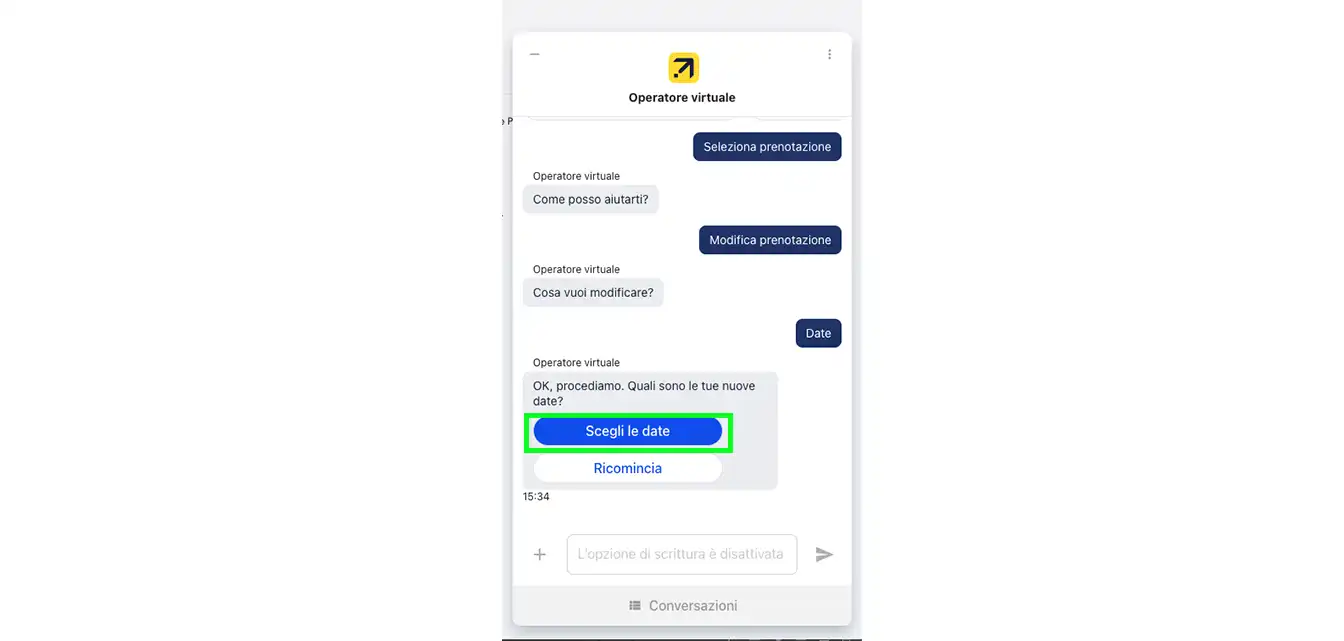
3. Scegli le nuove date del viaggio
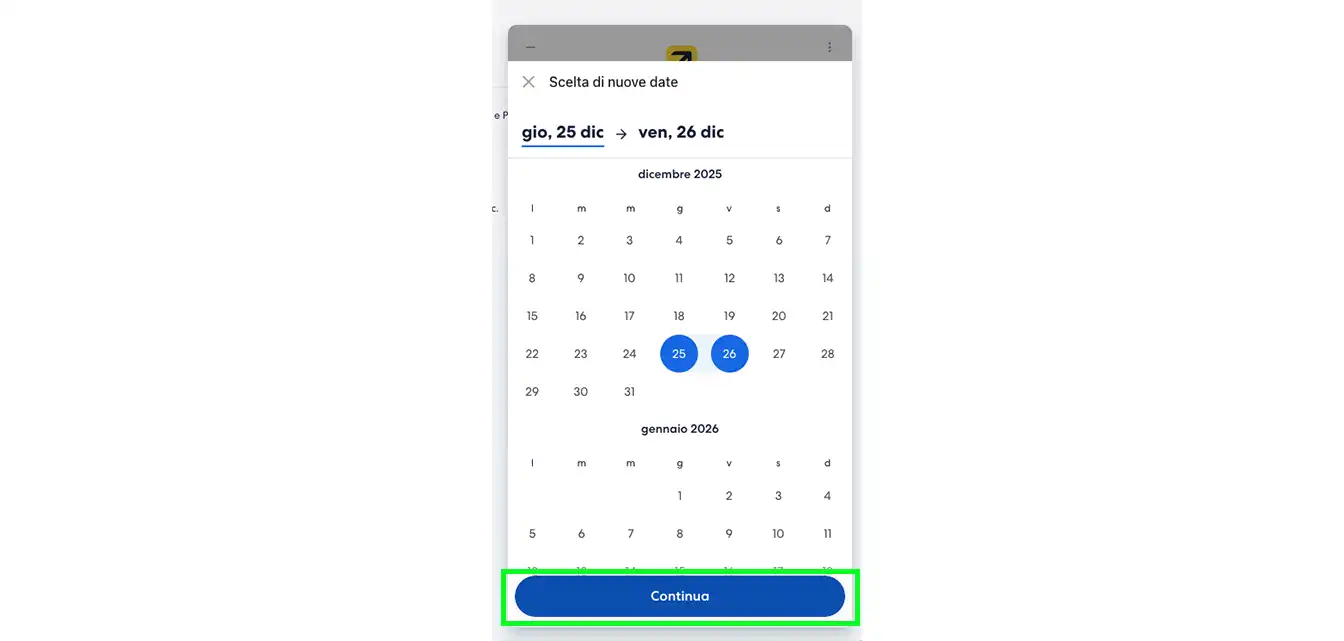
Selezionando Date, si aprirà un calendario in cui potrai scegliere le nuove date di check-in e check-out. Una volta aggiornate, clicca su Continua.
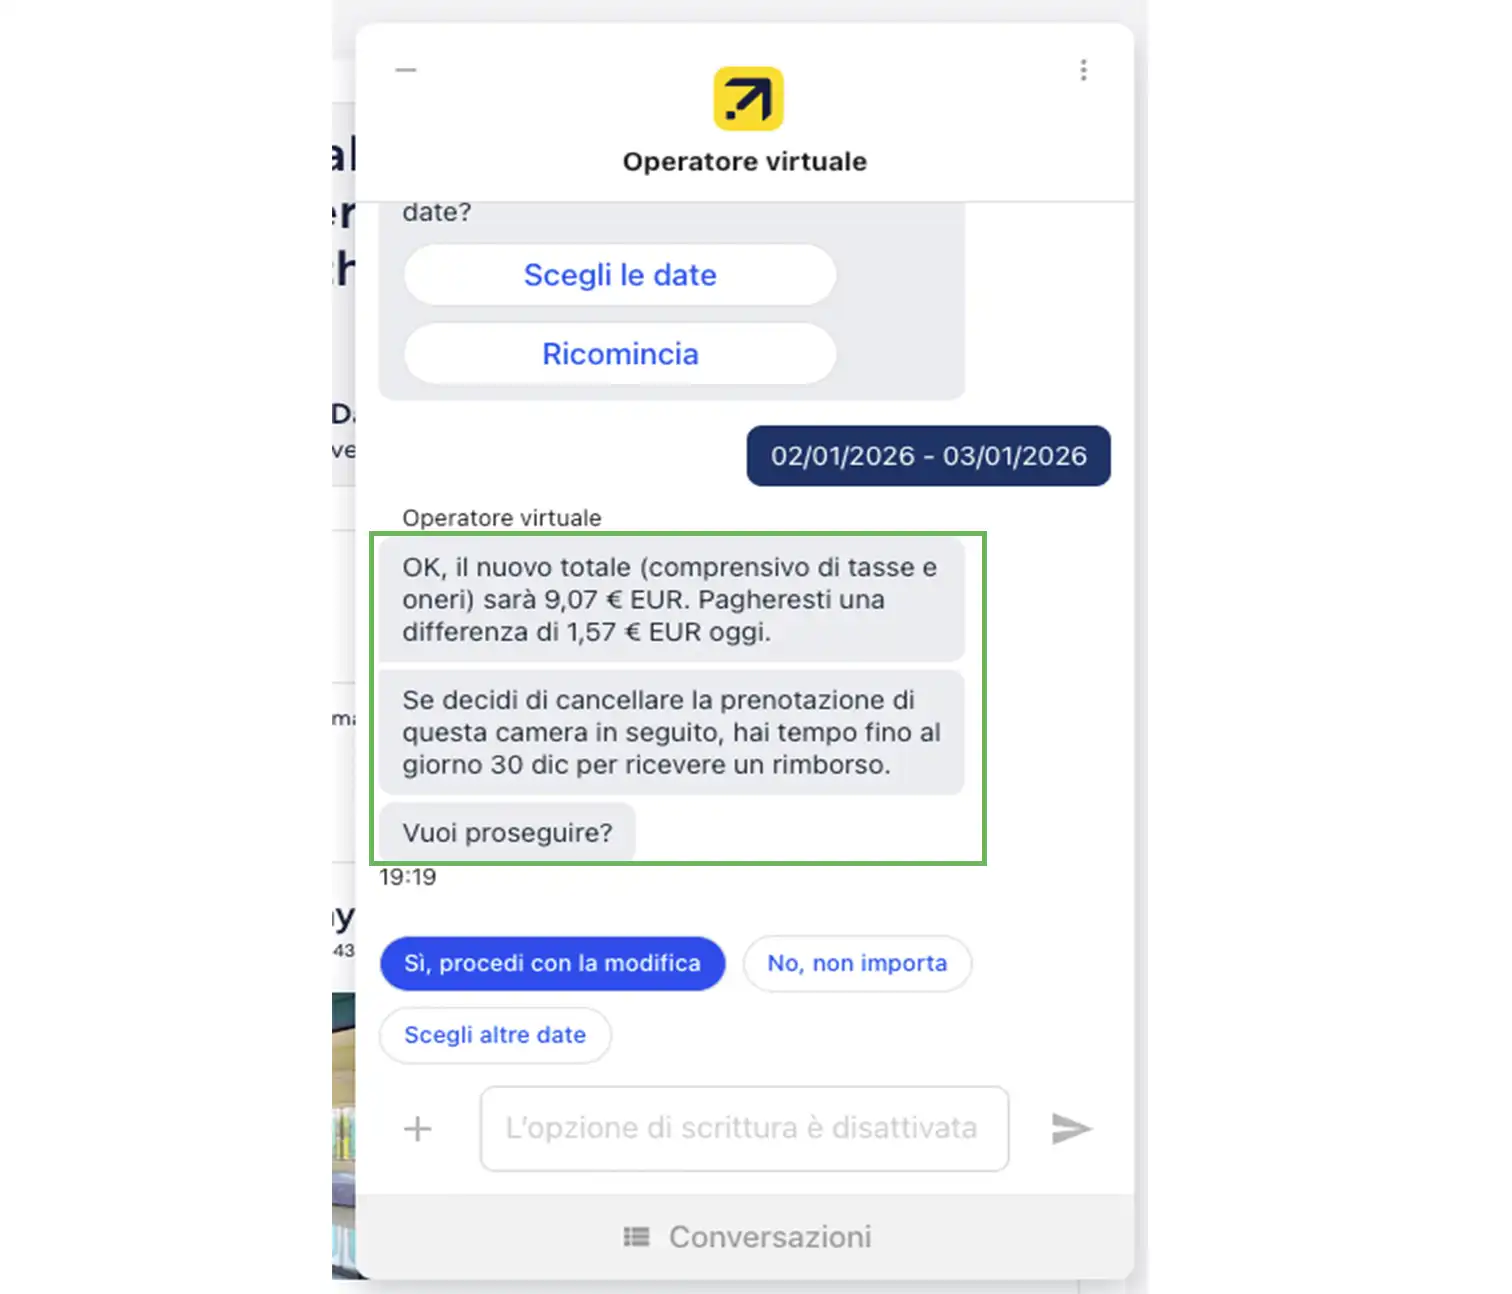
4. Controlla il prezzo aggiornato
L'operatore virtuale ti comunicherà il prezzo per le nuove date di viaggio. Se tu e il viaggiatore siete soddisfatti del prezzo aggiornato, clicca su "Sì, effettua la modifica" per passare al pagamento.
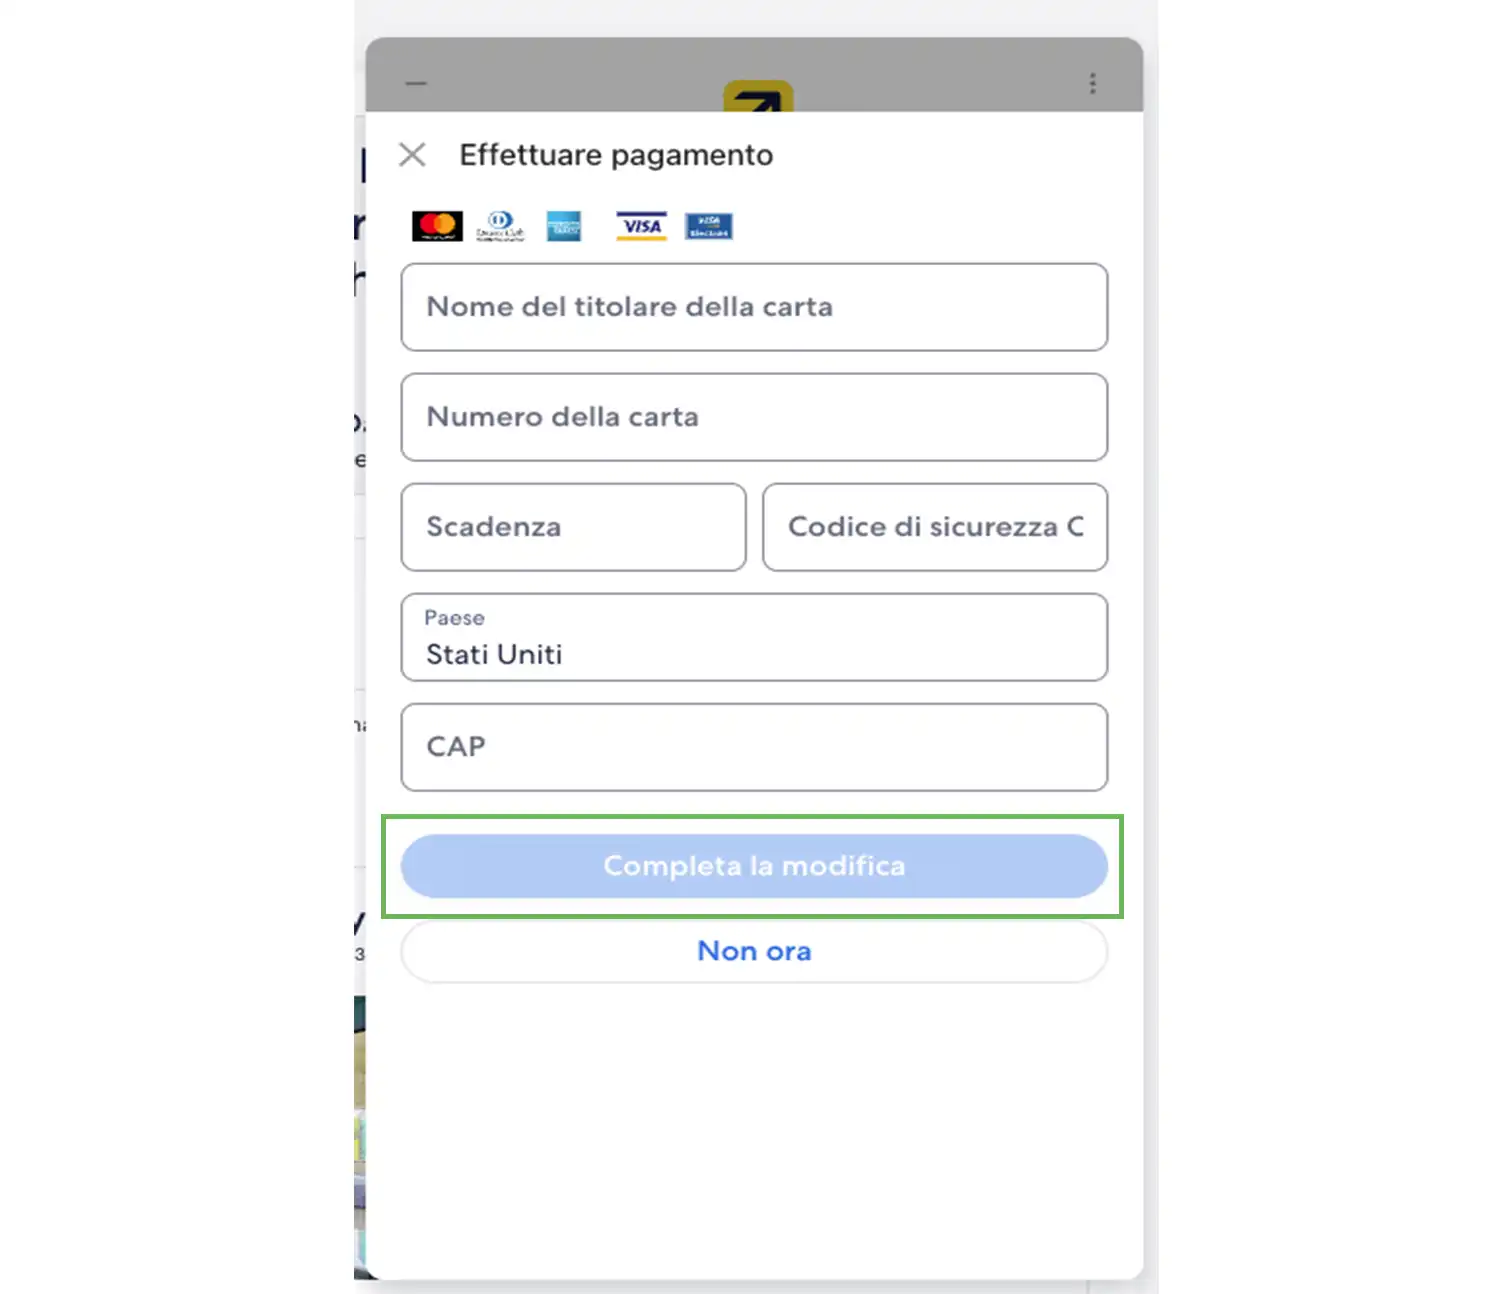
5. Pagamento
Inserisci i dati della carta di credito per il pagamento e clicca su Completa la modifica per terminare.
Hai modificato le date della prenotazione tramite l'operatore virtuale.