Using the virtual agent to manage reservations
We love making it easier for you to support travelers. That’s why we've built an AI-powered Virtual Agent that allows you to:
Effortlessly manage property bookings
Quickly check the booking refund status
Increase your efficiency by self-servicing right from the Trips or Itinerary pages
What’s more, the Virtual Agent uses machine learning so it will continuously get smarter and broaden its chat interface support capabilities.
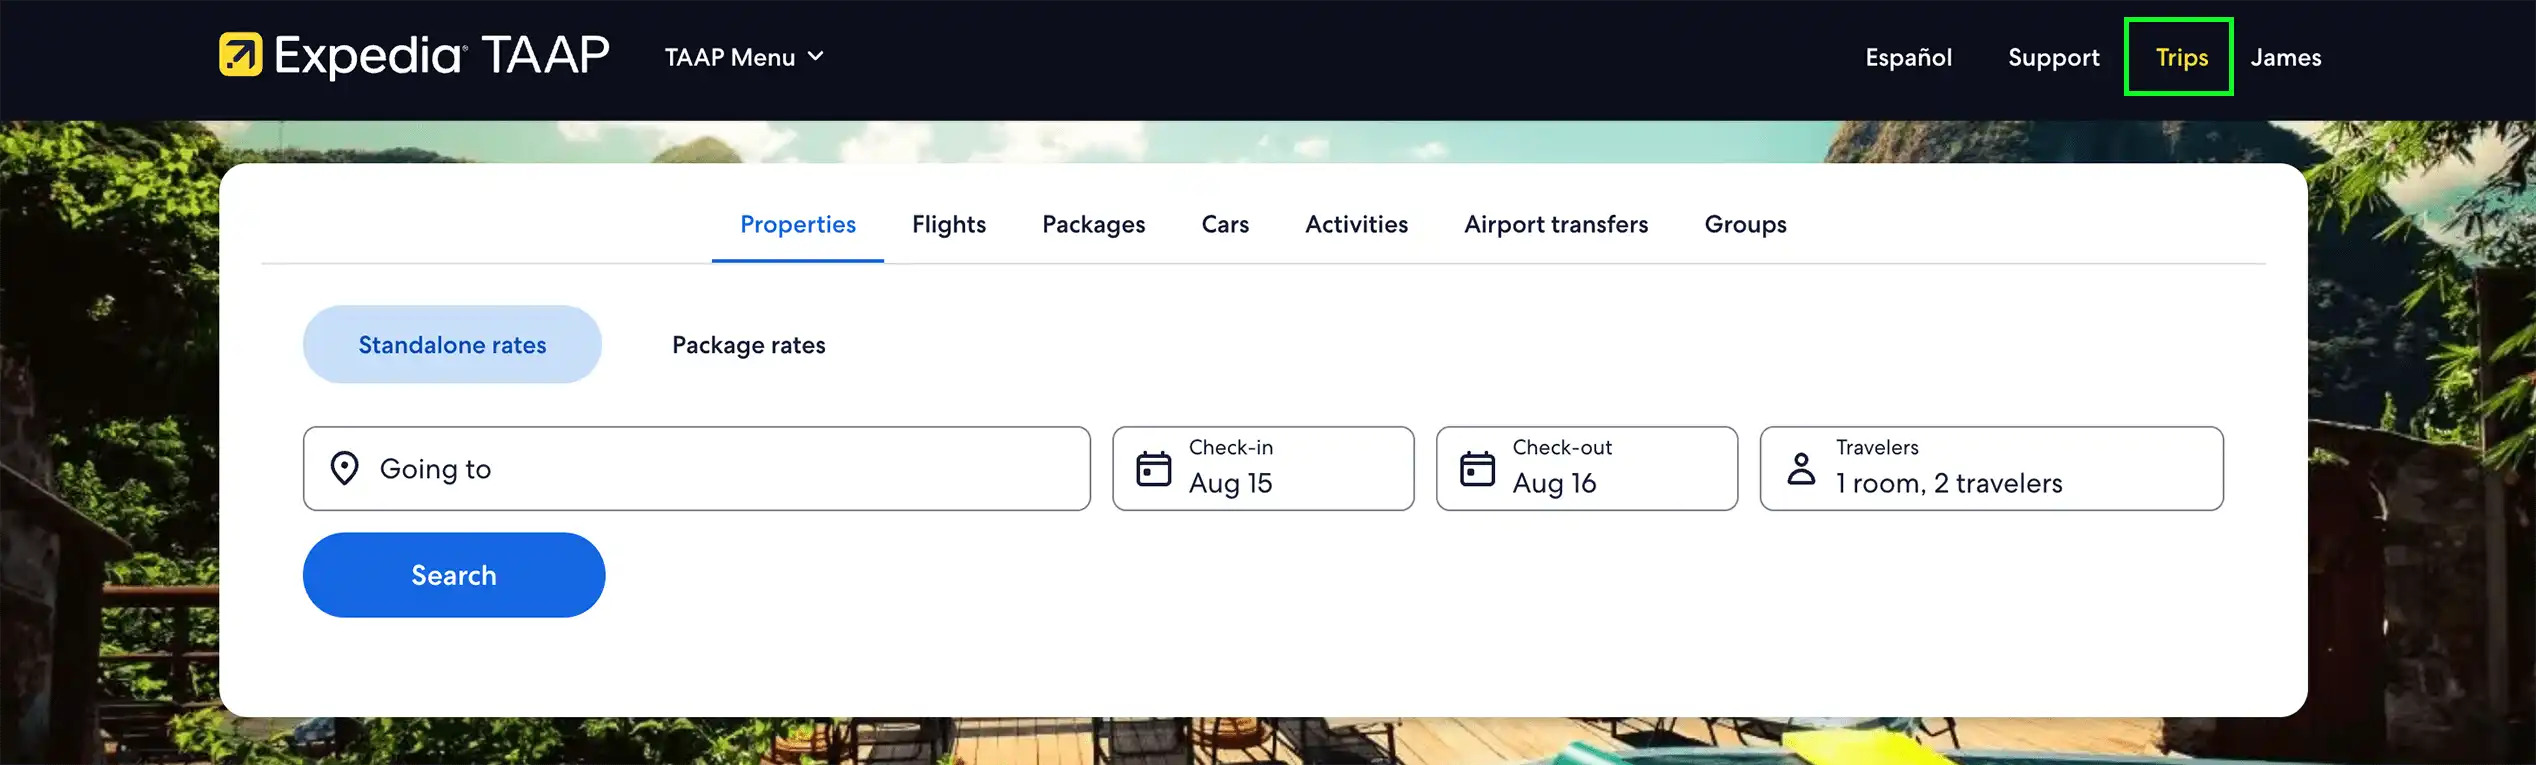
1. Go to my Trips
You can find Trips at the top of your Expedia TAAP homepage.
2. Click Help
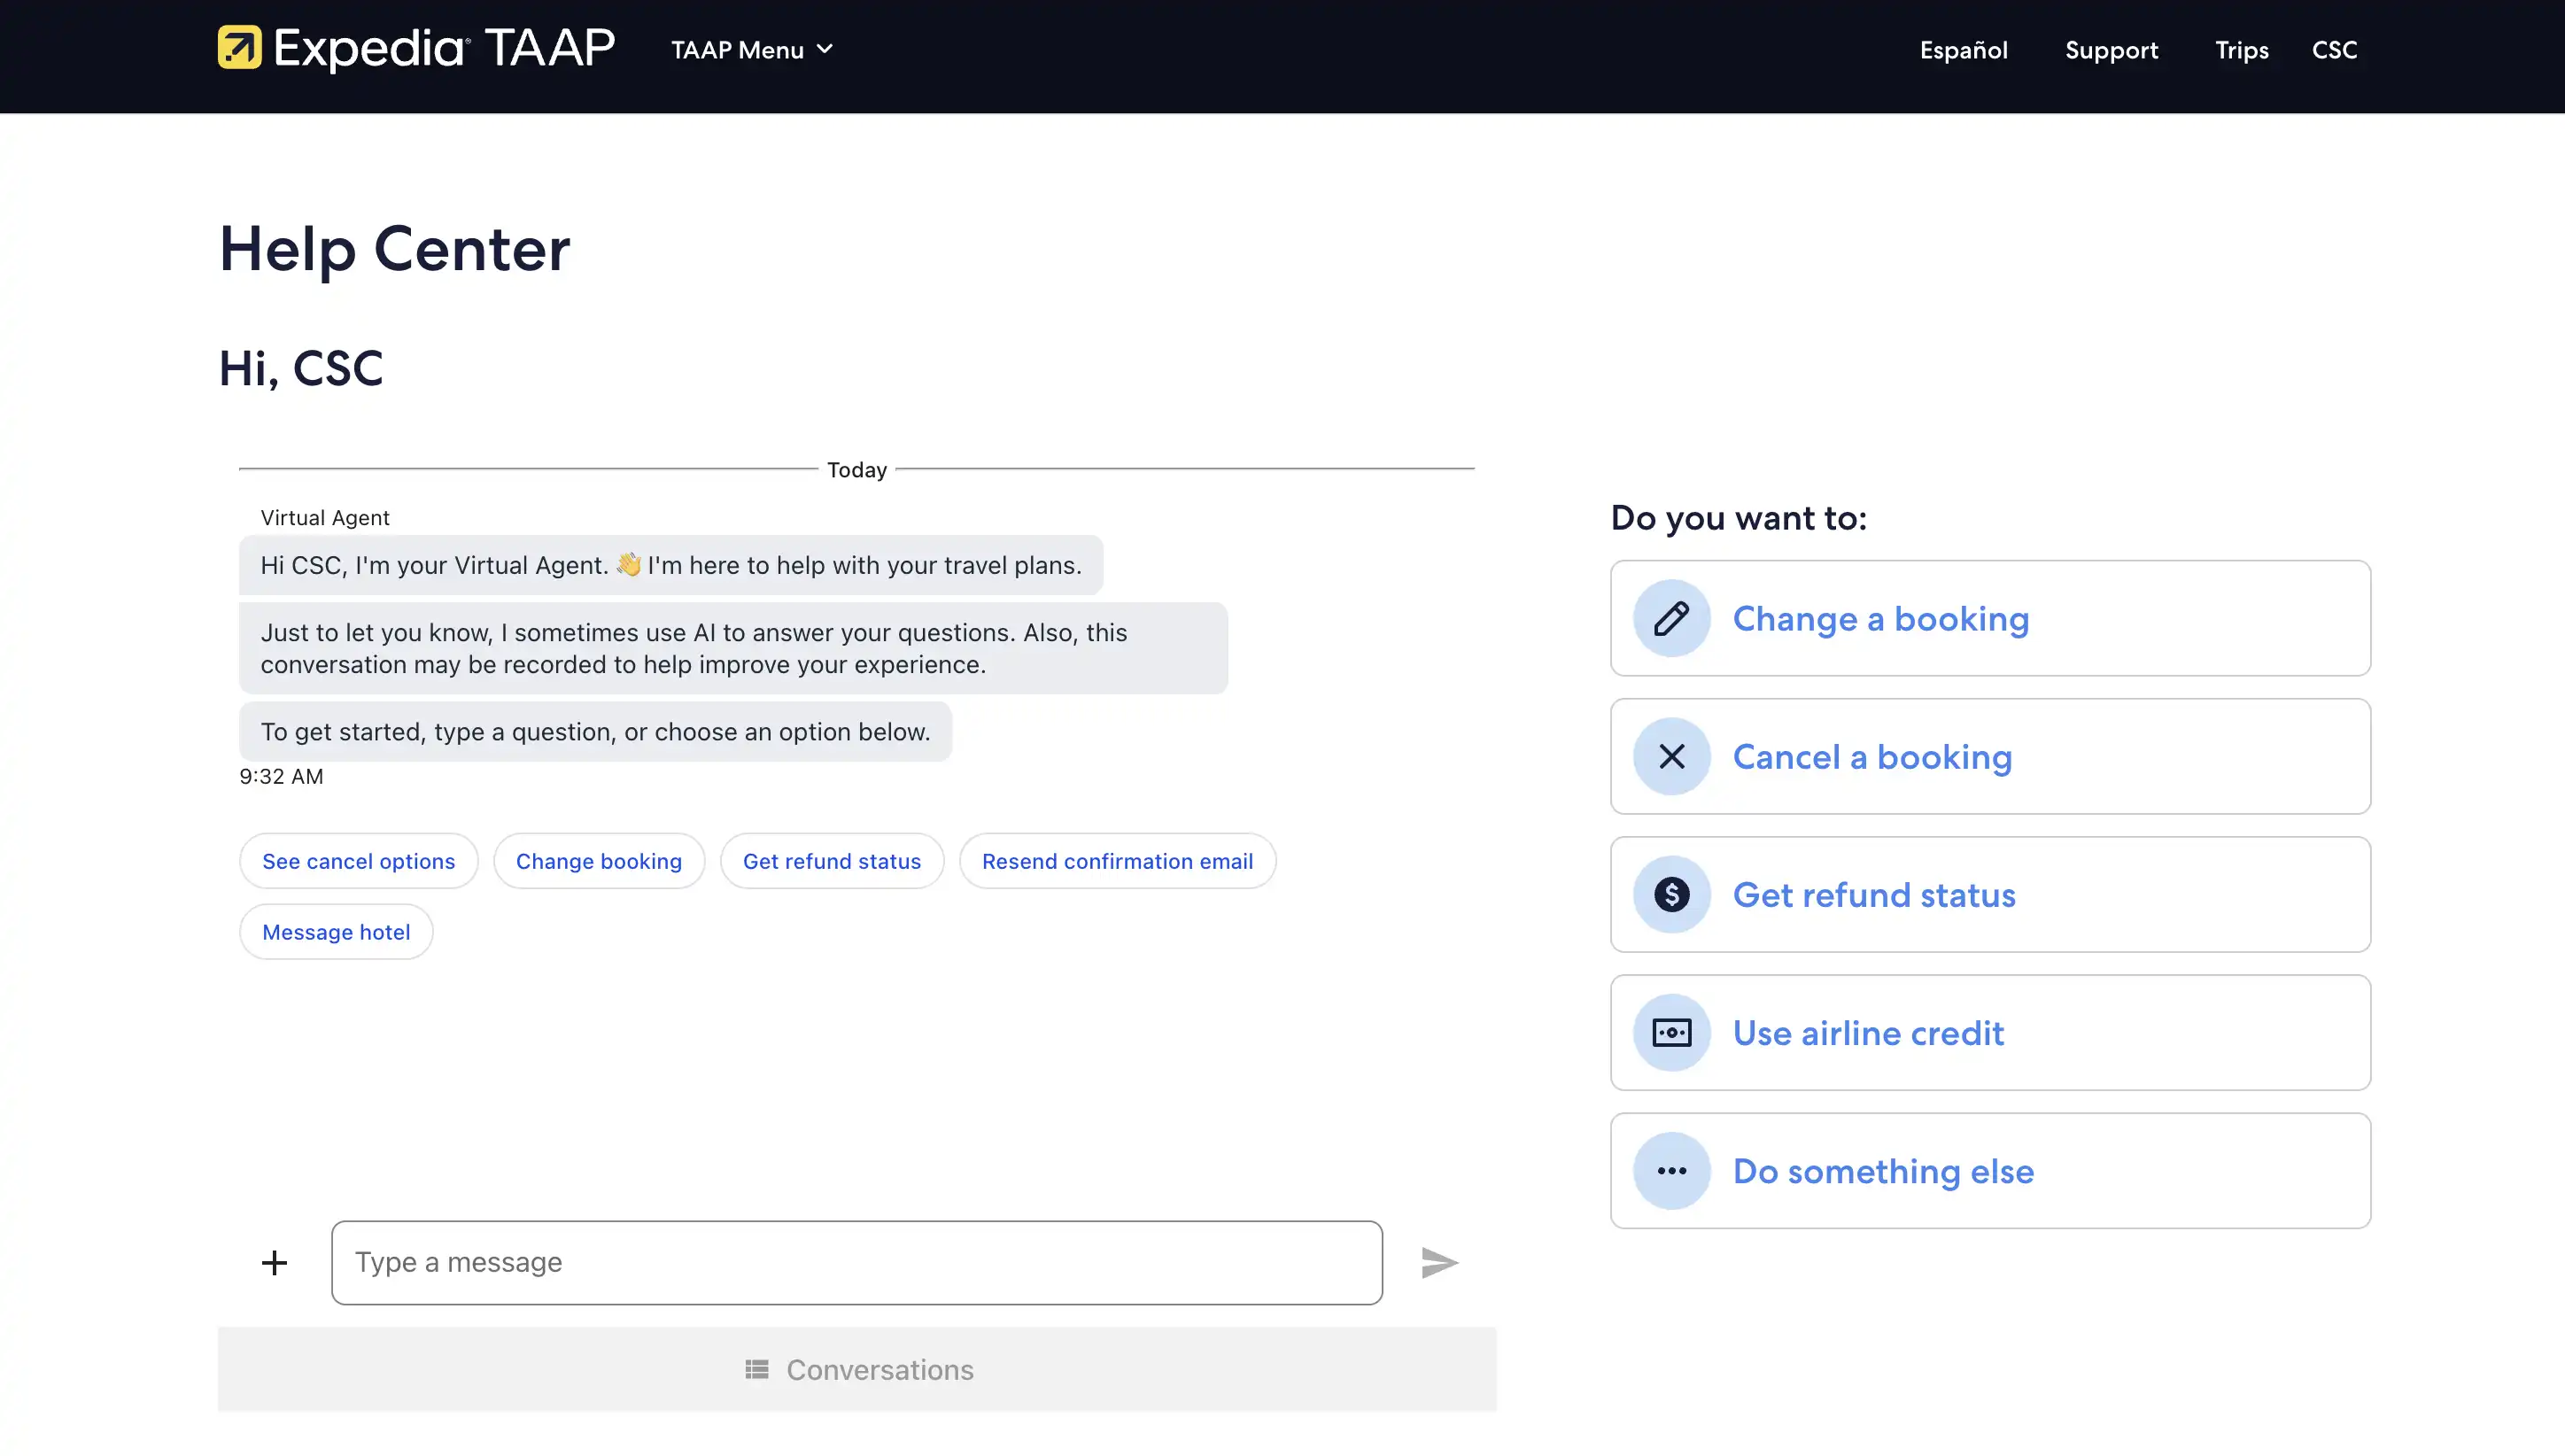
On the bottom-right corner, you should see a floating chat button – clicking this will open a chat interface, initiating the Virtual Agent. If you do not see this, then the Virtual Agent might not yet be available in your language. Try swapping to the English site to open the Virtual Agent.
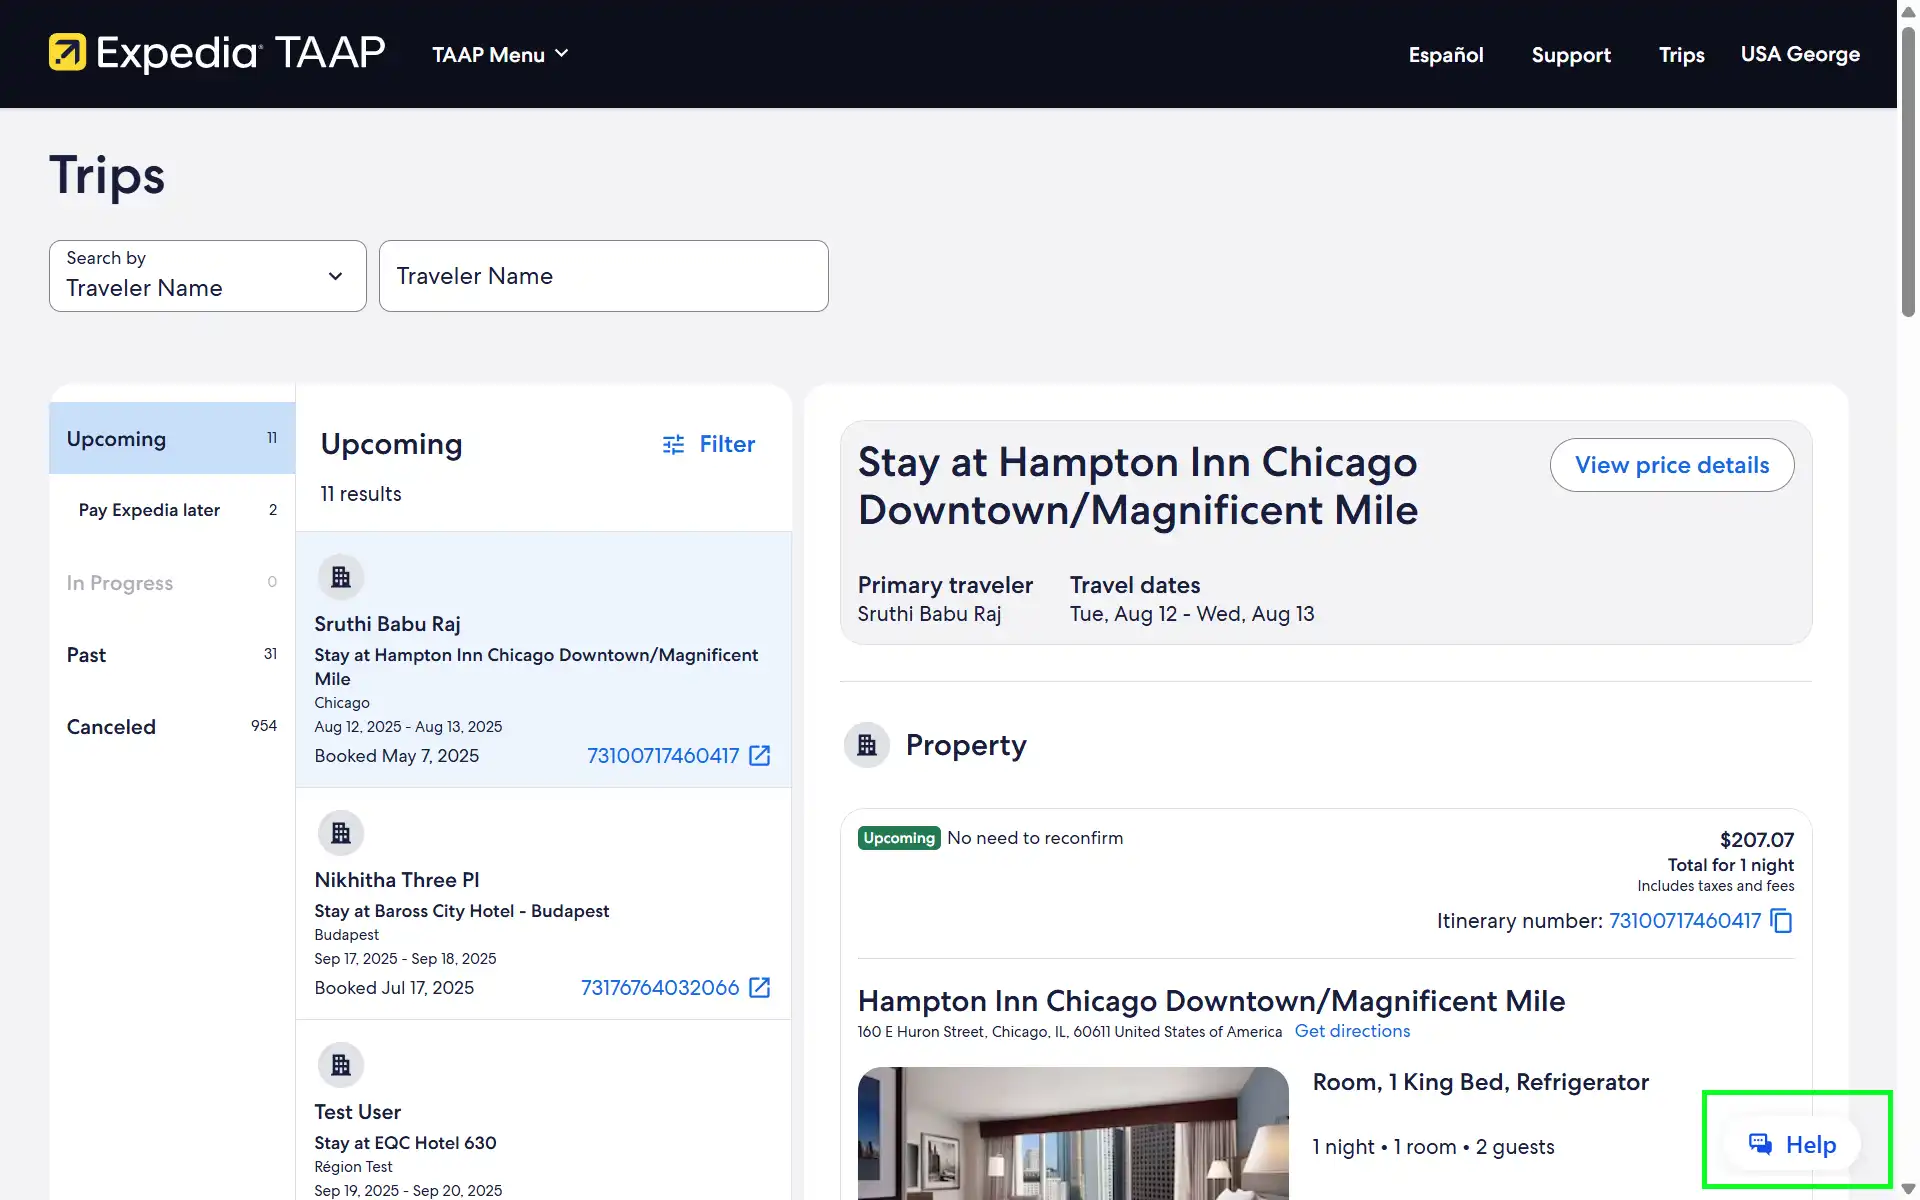
You can also access the Virtual Agent from other pages, such as the Itinerary Page or Support tab (example below).
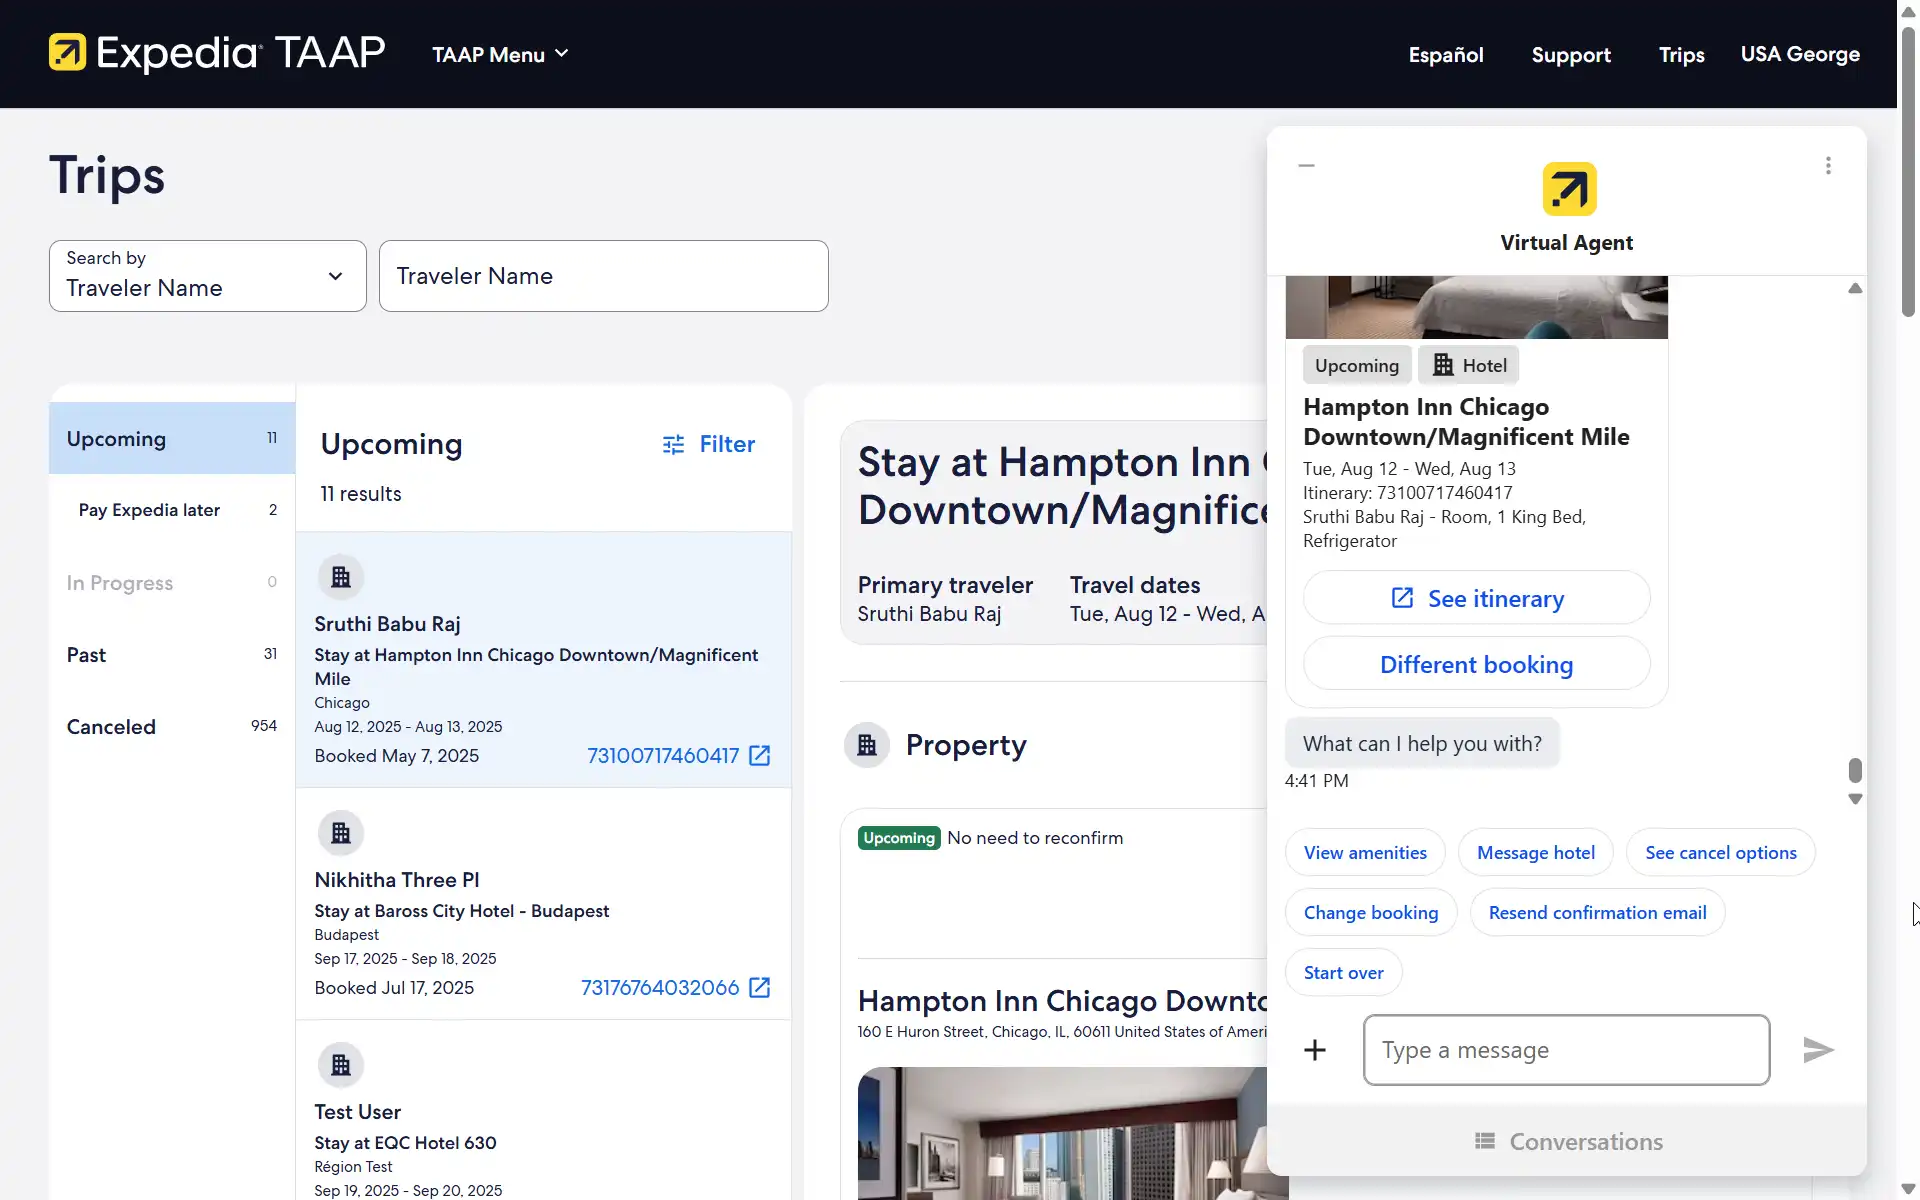
3. Engage with the Virtual Agent
When you click the floating help button, the Virtual Agent will open and automatically present you with a carousel of your upcoming bookings for quick selection. You can click Past and canceled and select a previous itinerary, to inquire about the booking refund status. Additionally, you can also access the Virtual Agent from other pages, such as the Itinerary Page or the Support menu. (example below).
Here's how to use it:
Using the Virtual Agent is intuitive. Simply follow the prompts and tell it what you need help with. It will respond and support you to the best of its abilities. If the Virtual Agent is not able to help you this time around (as it’s still learning and enhancing its skills), then it will give you the relevant phone number to contact for support, or if you type chat to agent we will connect you to a live agent via chat.
In this example, we want to modify an upcoming booking at the Pondok Denayu Homestay since the travelers want to stay an extra night.
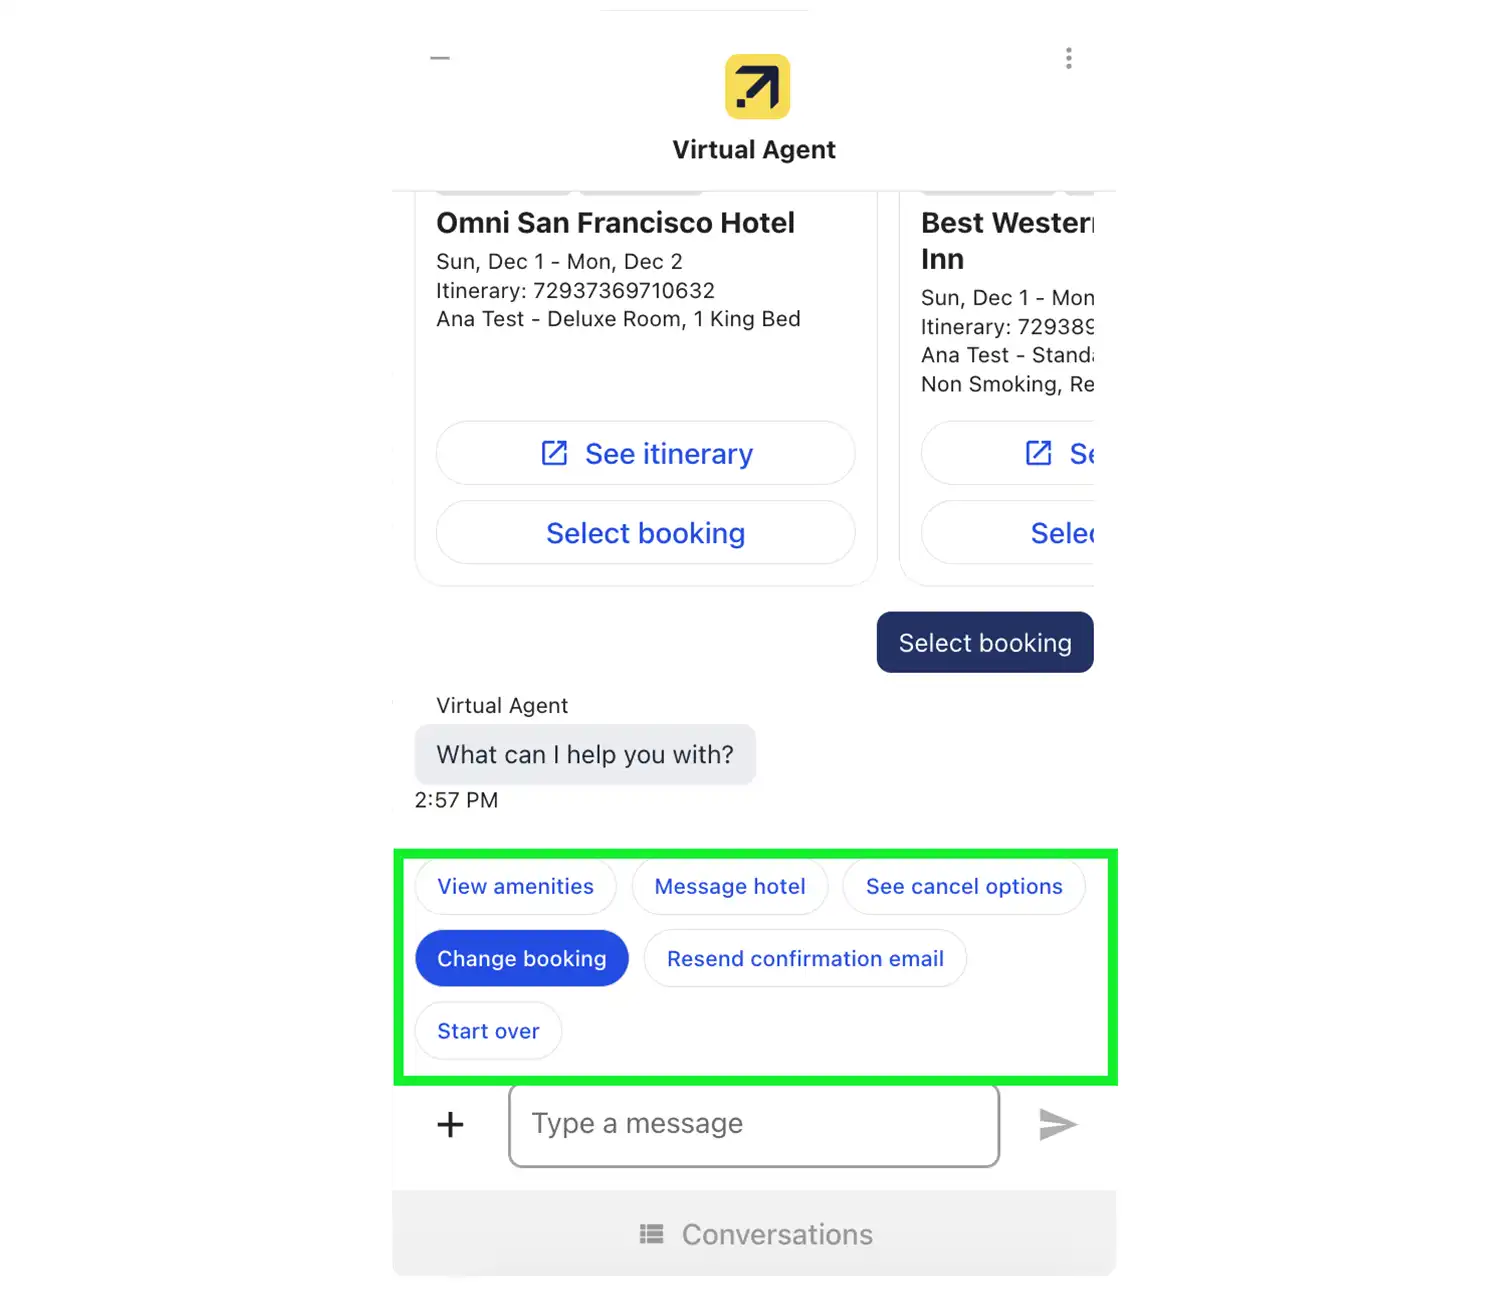
1. Select the booking and then click Change booking
After selecting the booking, choose one of the prompts provided, such as Change booking.
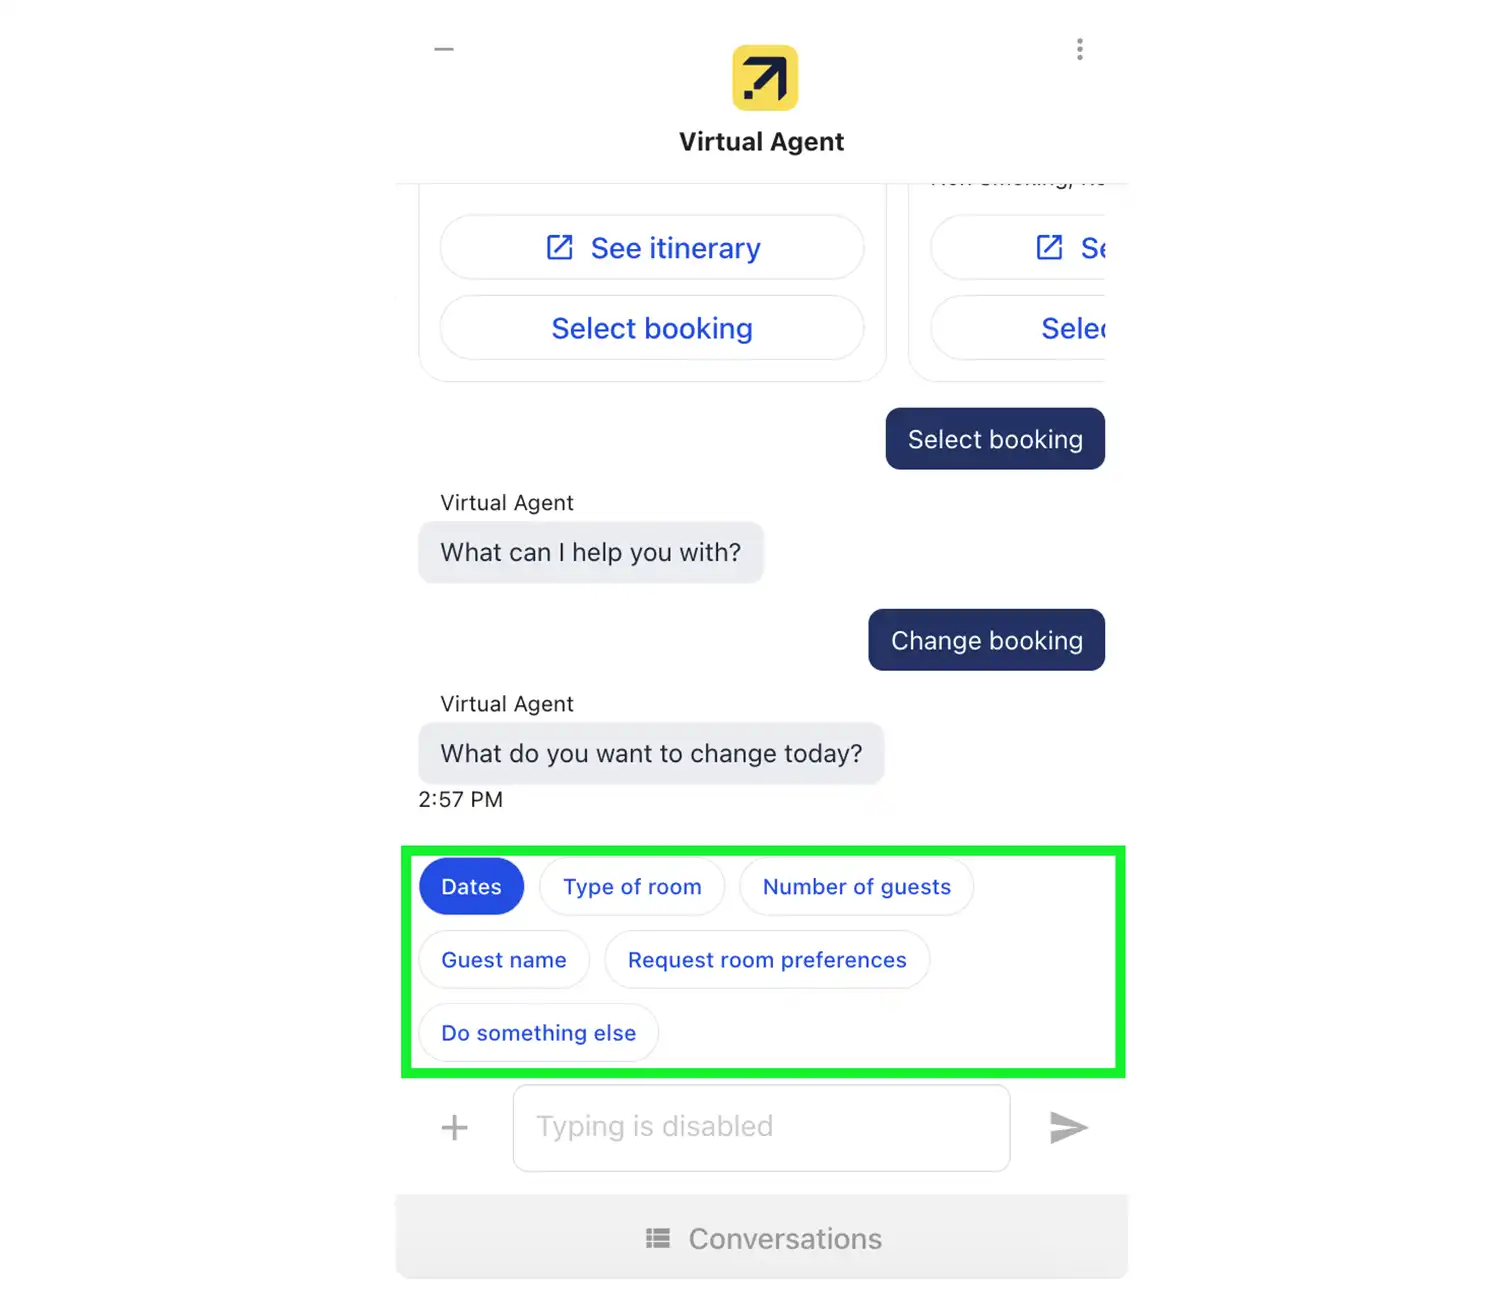
2. Select the change requirements
The Virtual Agent will now ask what you would like to change. Since we want to add an extra night, select Dates from the list of options.
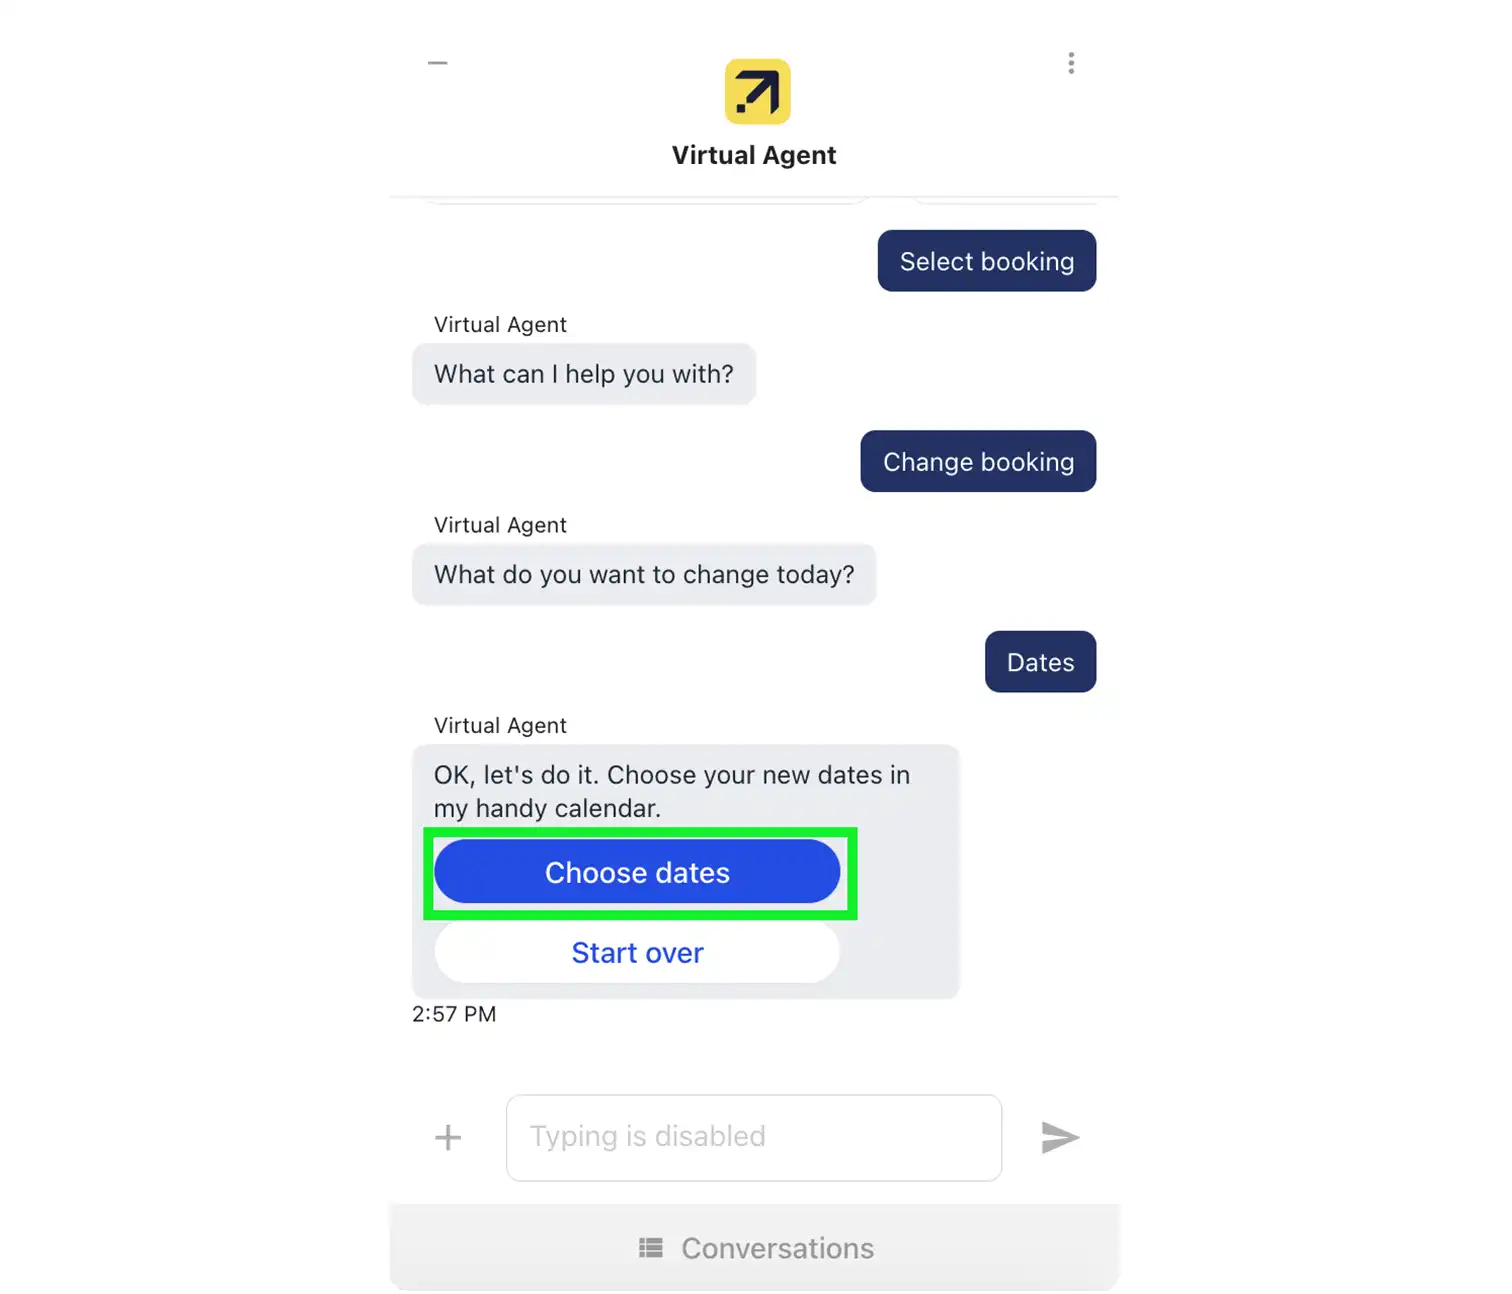
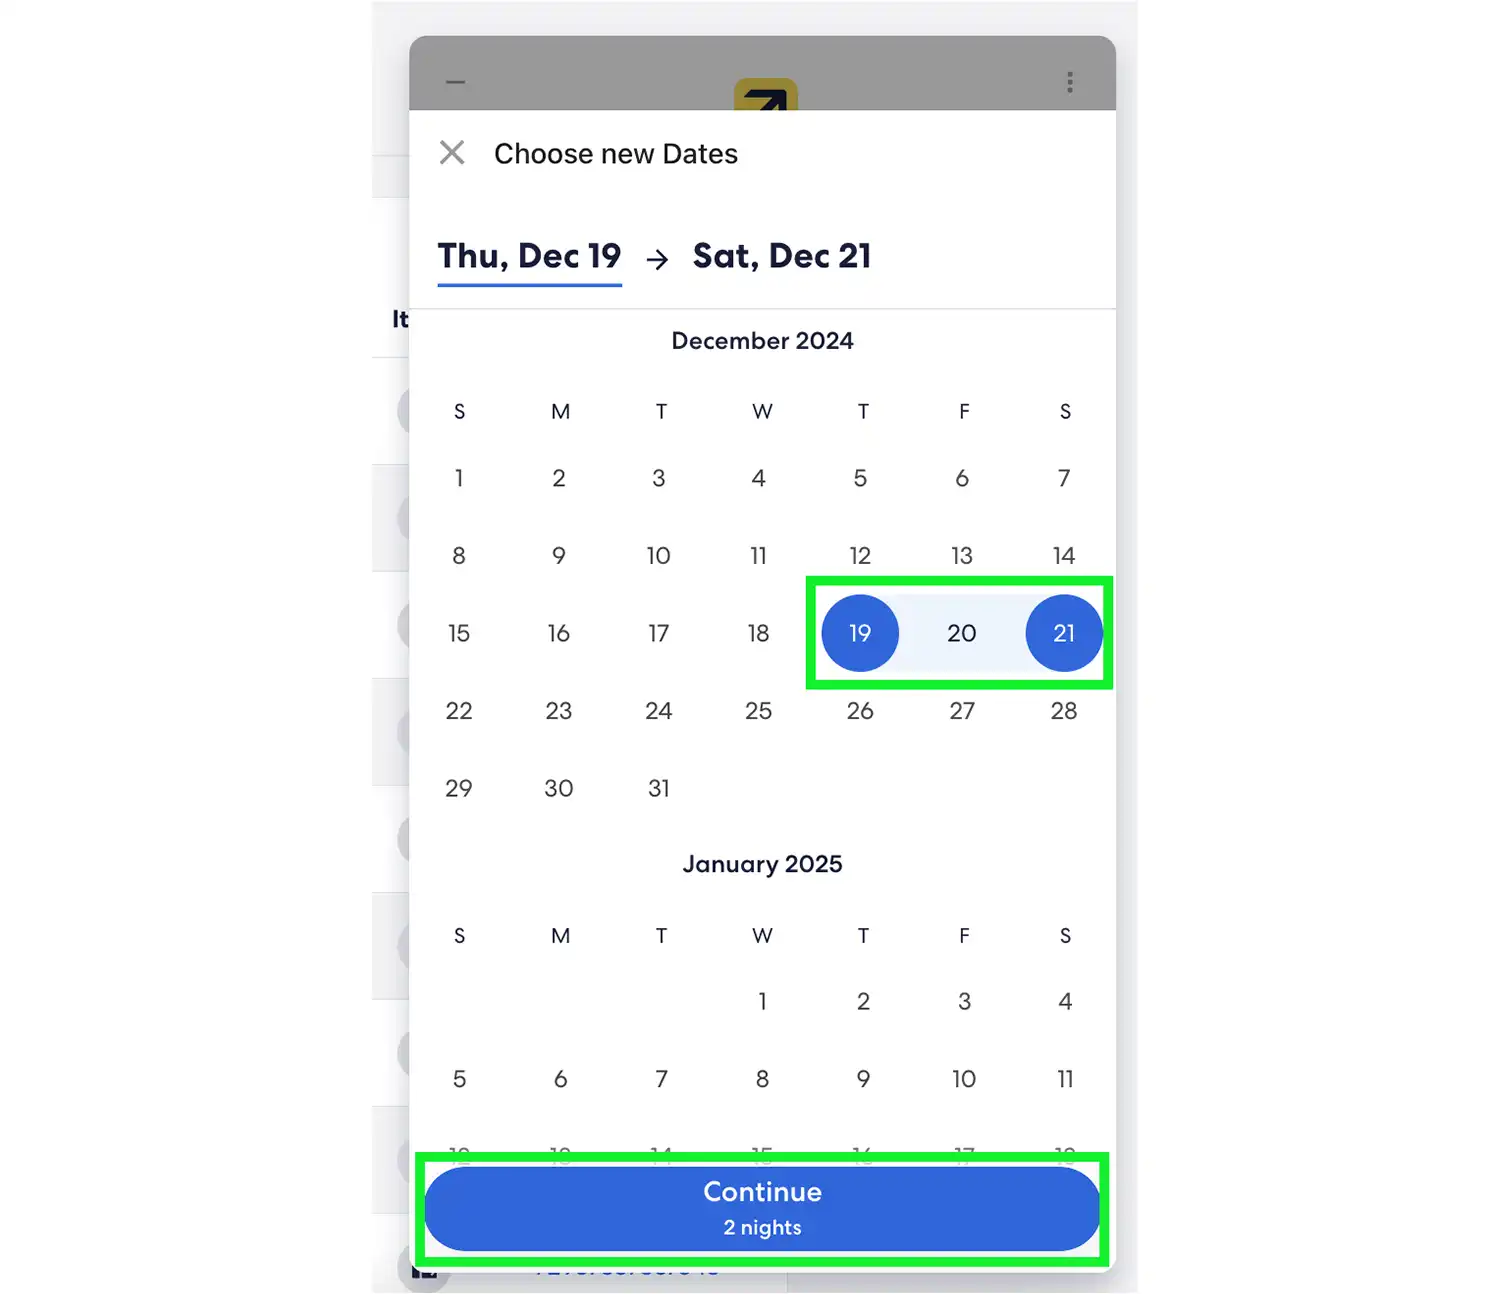
3. Choose new travel dates
Selecting Dates will open a calendar for you to choose the new check-in and check-out dates. Once updated, click Continue.
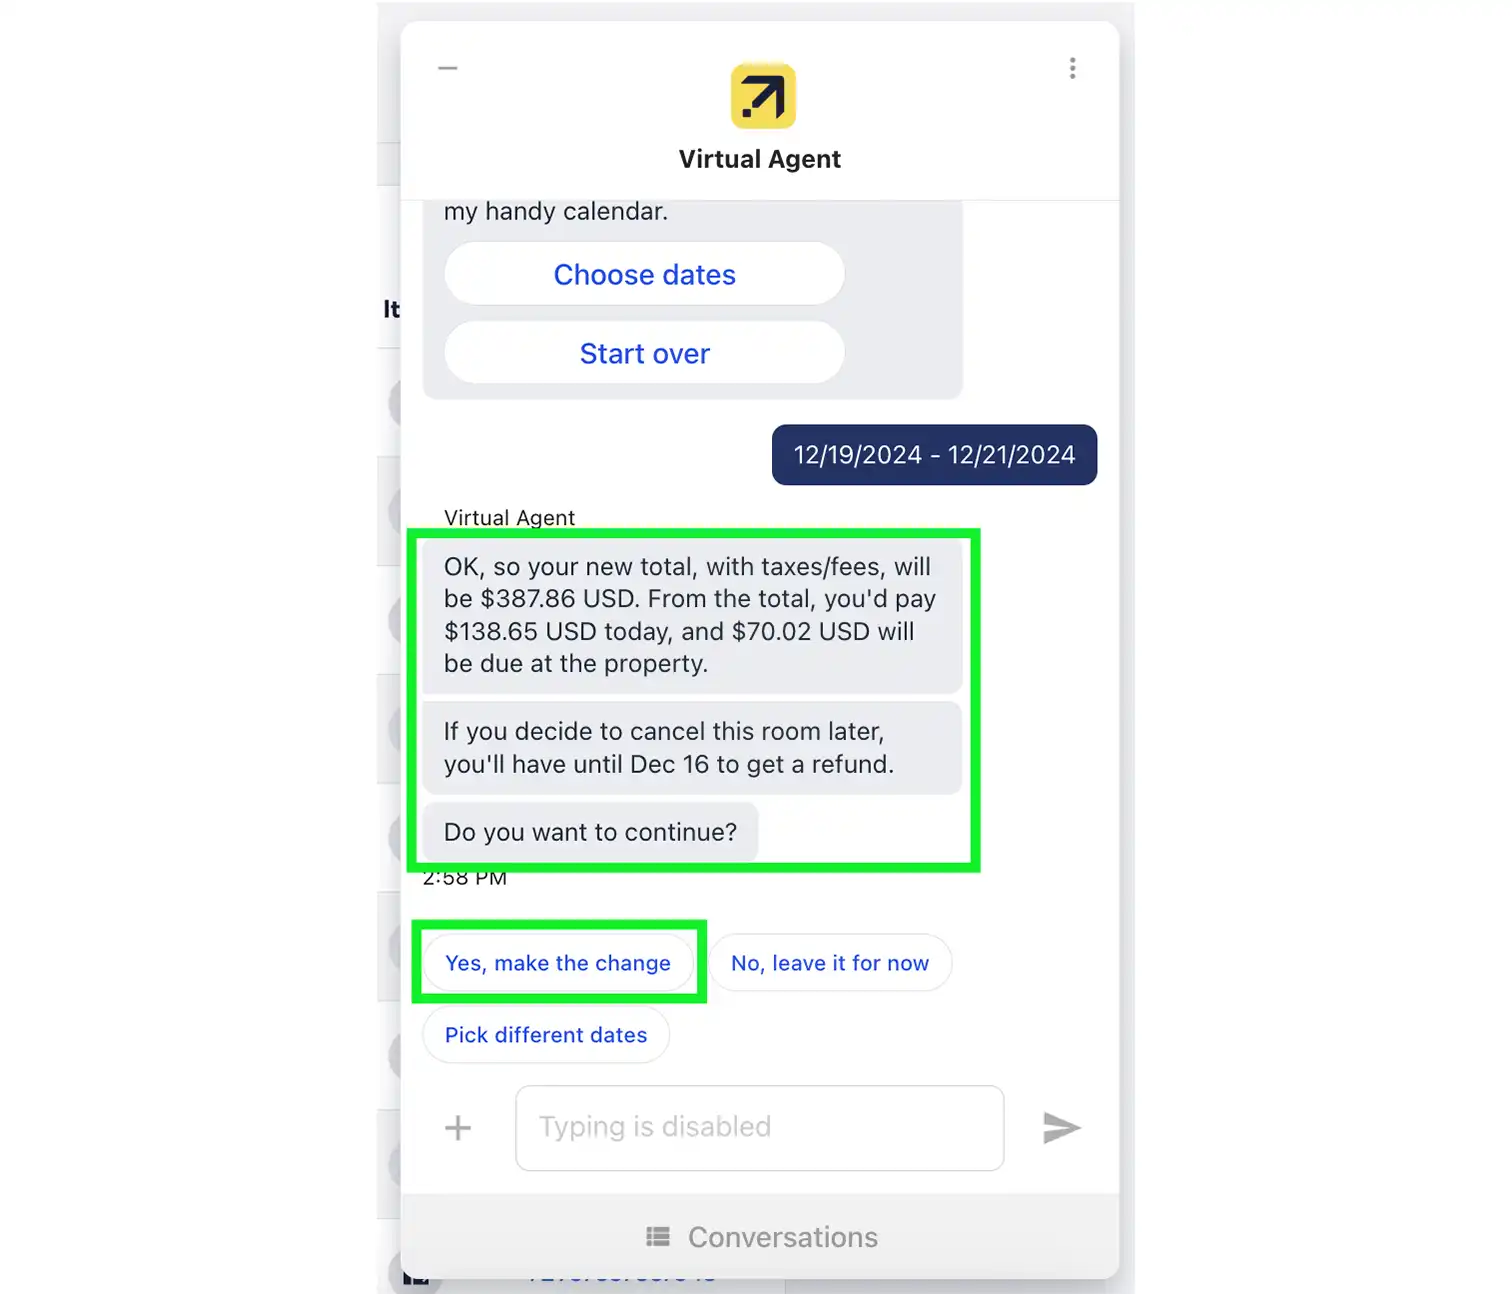
4. Review the updated price
The Virtual Agent will now check the prices for your updated travel dates. If you and the traveler are happy with the updated price, click ‘Yes, make the change’ to move onto check-out.
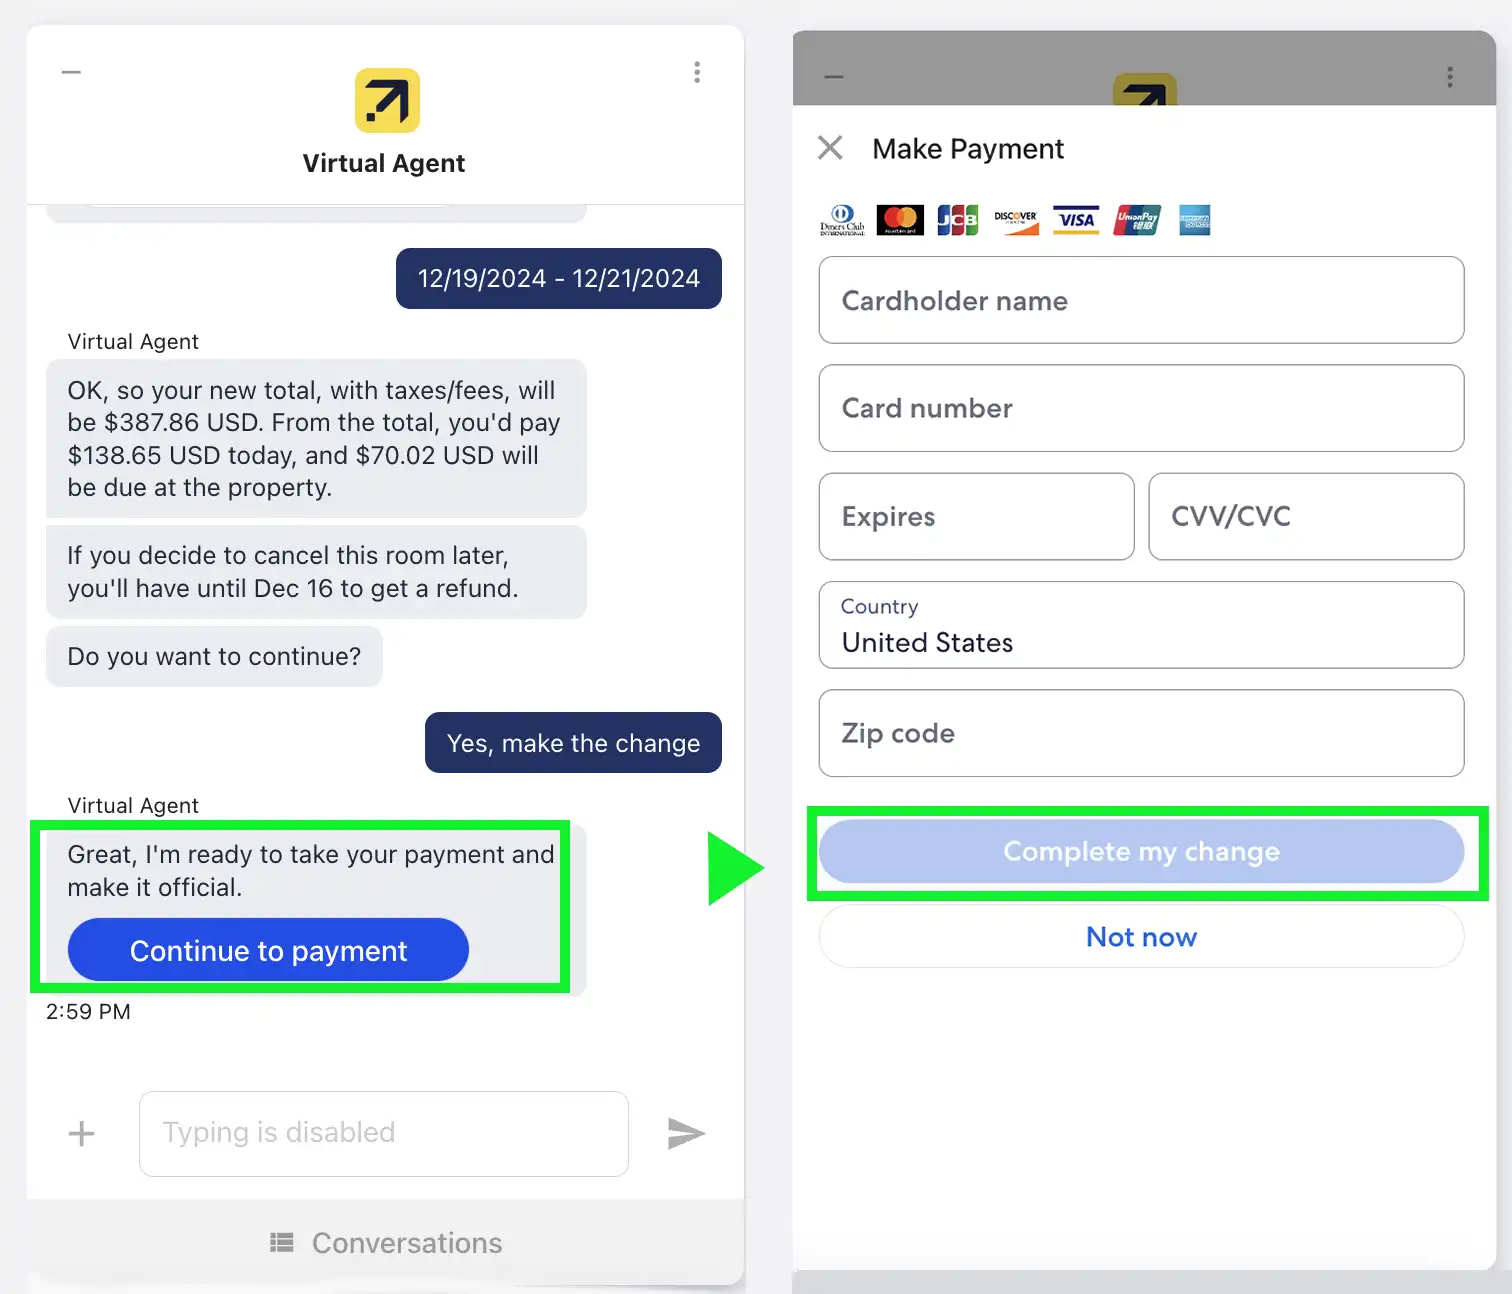
5. Check-out
Enter the credit card details for payment and then click Complete my change to finalize the change.
You’ve now changed the dates of the booking using the Virtual Agent.