Setting up your banking information with Onyx
When your first commission payment is due, our payment provider will contact you requesting you to set up your Onyx account and provide your banking details. Onyx is a payment provider Expedia TAAP uses to pay agency commissions. Do not ignore this email, as you need to set up your account and submit your bank details first, to receive your payment.
1. Register your Onyx account
Once a commission payment is due, Onyx will send you an email. Click the link in the email to begin your account setup.
2. Create your password
The first time you access the Onyx site you must click Need your Username or password?
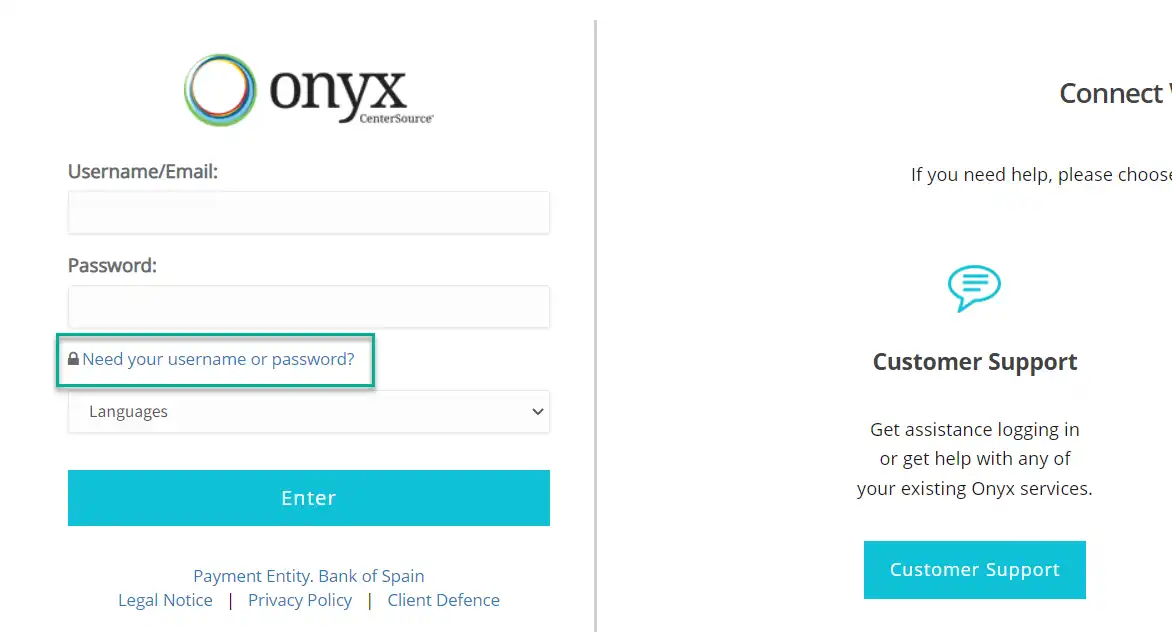
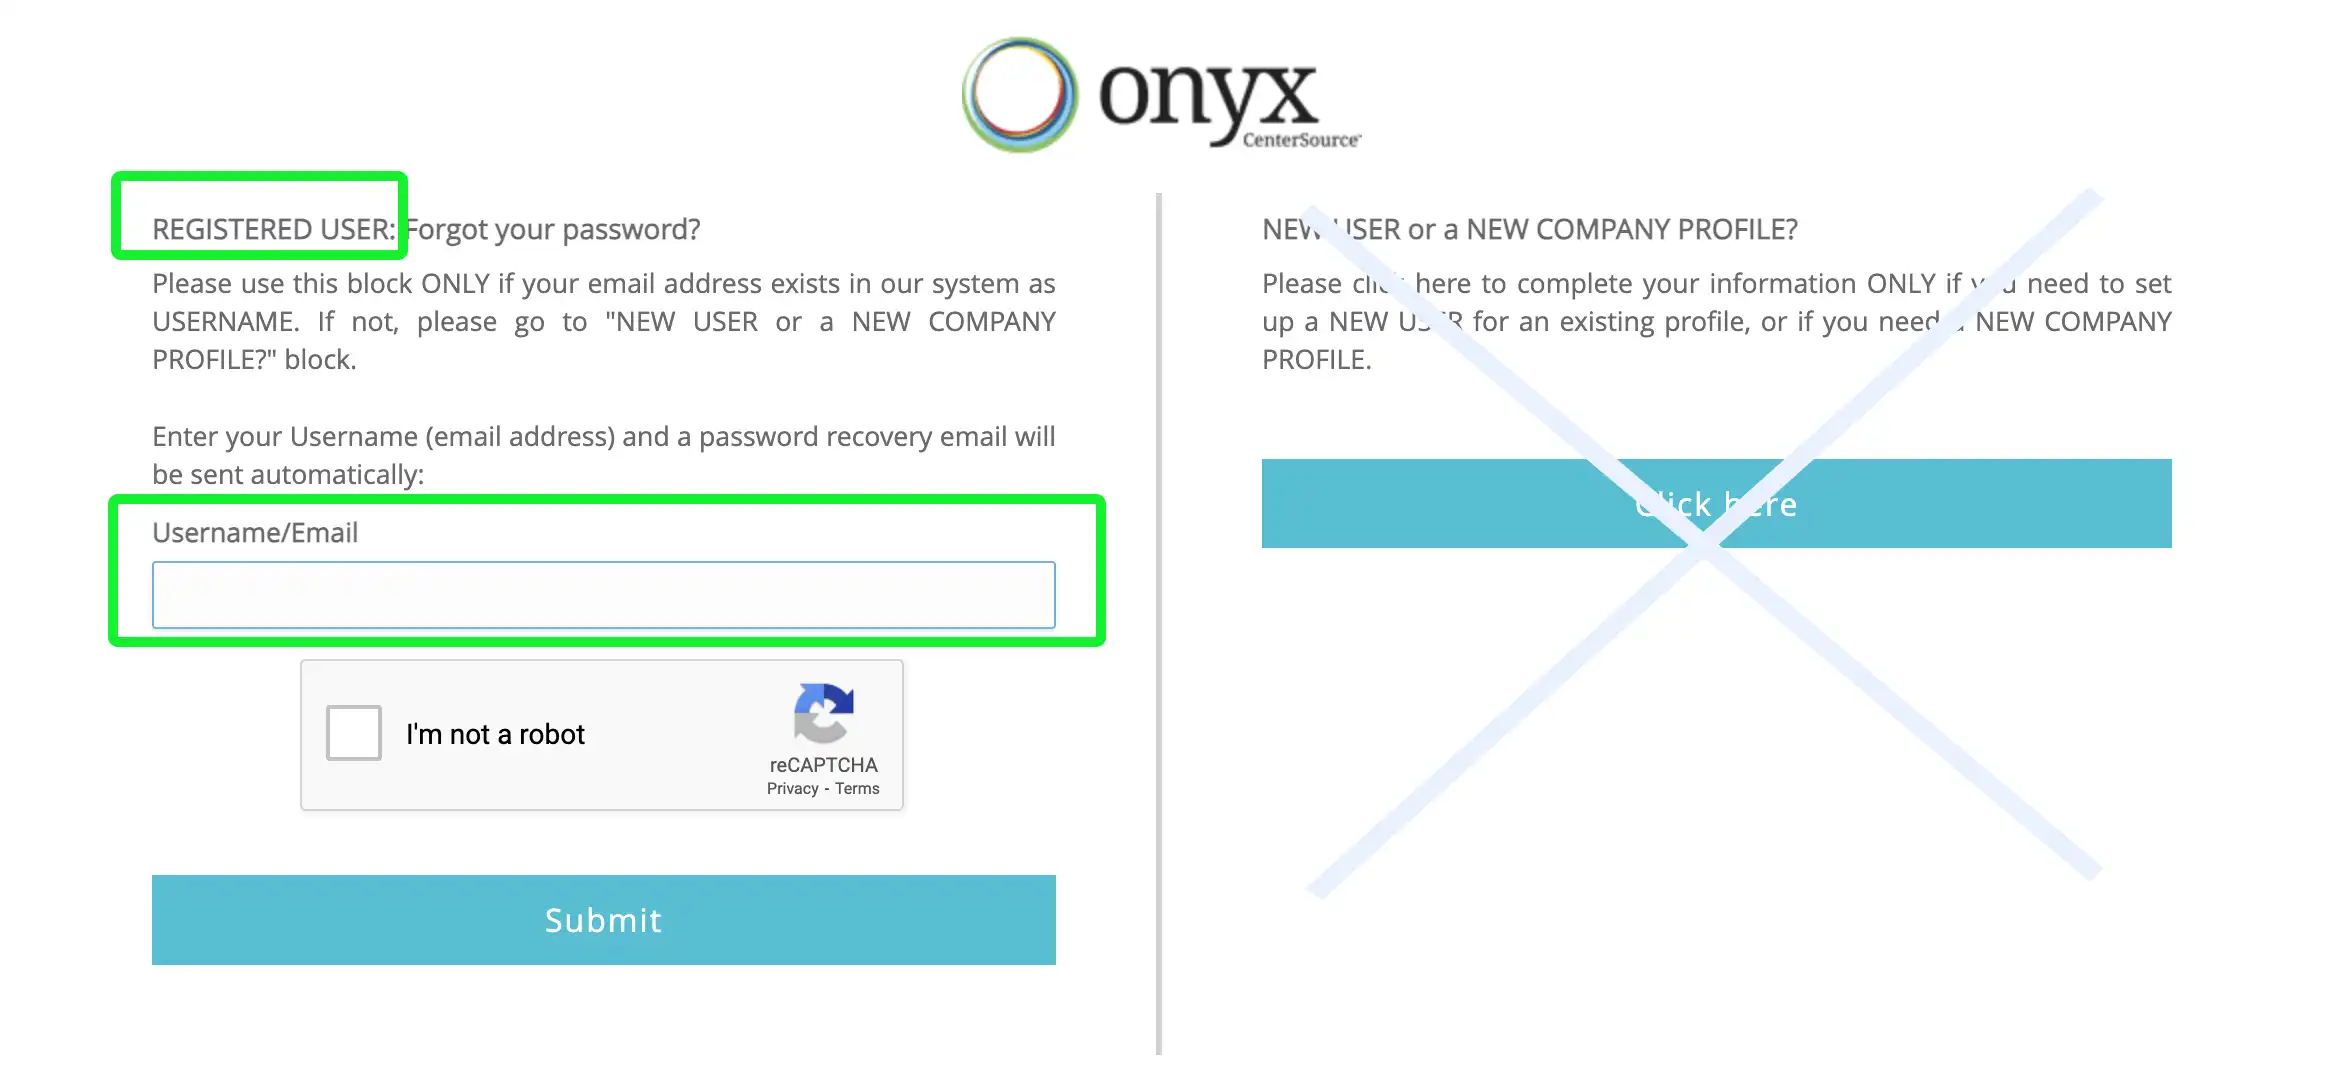
On the next page, on the left side of the screen (Registered User) enter the same email address you used when registering with Expedia TAAP. Shortly after you’ll receive an email from Onyx. Use the link in the email to create your new password.
3. Access your Onyx account
Visit the Onyx site and use your newly created credentials to log in. After accessing your account, your agency profile and your Expedia TAAP tracking code will be shown. You can also change to your preferred language by clicking Change Language at the bottom of your profile details.
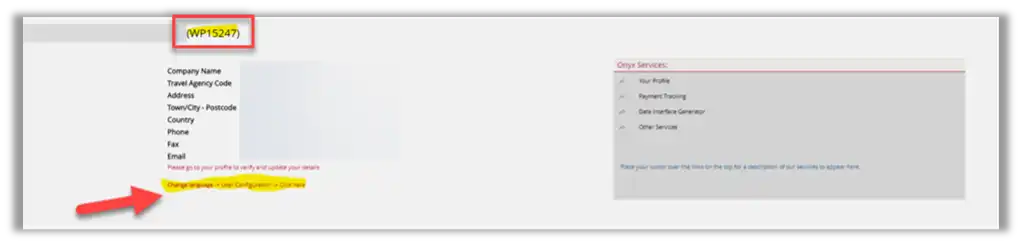
If you have already an existing agency profile with Onyx, make sure to click the drop-down menu on the top right of the page, and choose the correct profile (i.e., the one including your Expedia TAAP tracking code).

4. Provide your banking information
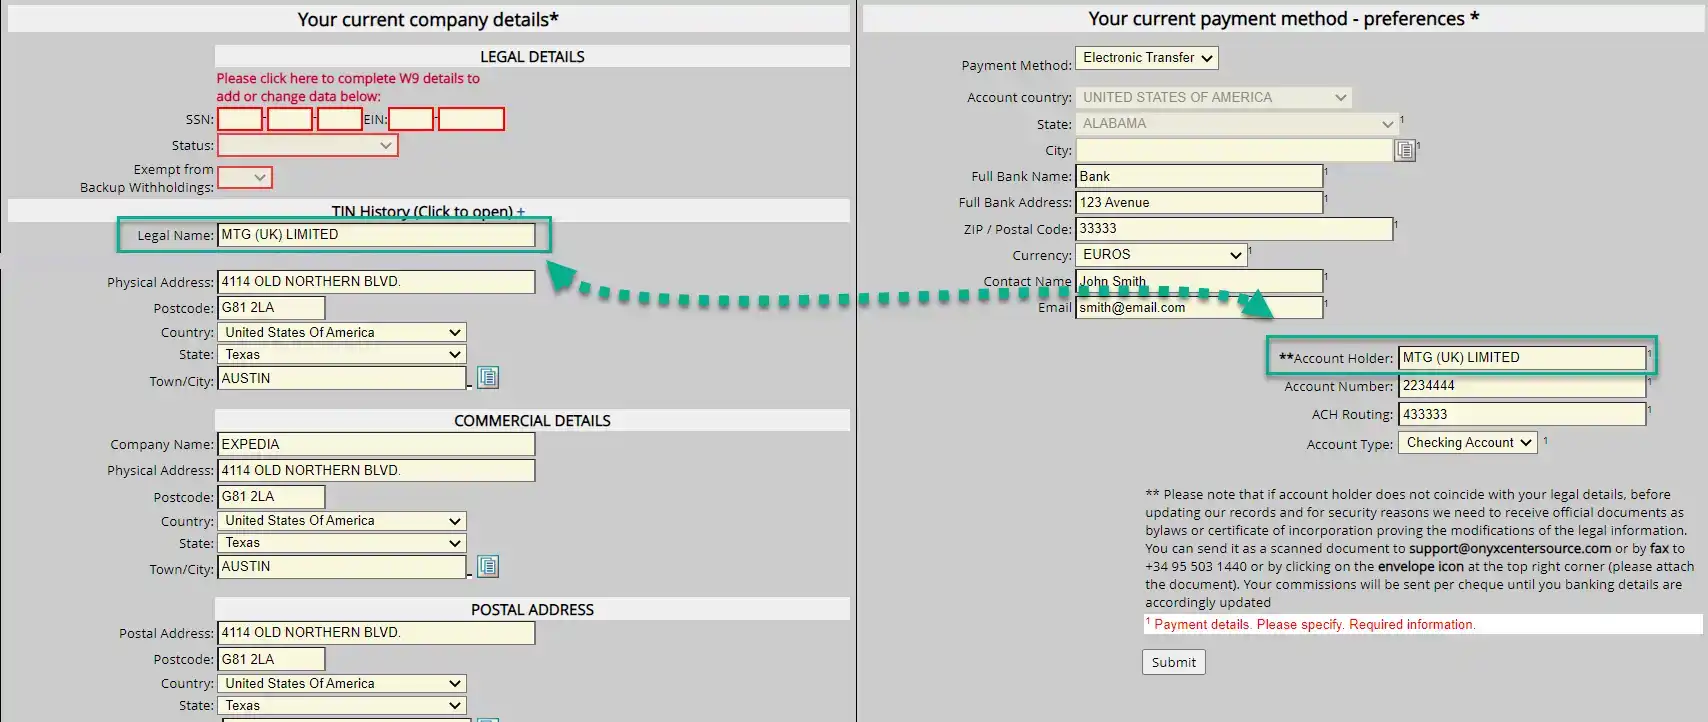
Navigate to your Expedia TAAP agency profile and complete all the information requested. Ensure your account holder's name matches your agency's legal name.
If the account name and the legal name are different, you will need to provide Onyx with legal documents that prove the connection between both entities.
5. Submit changes
Once the information is completed, press Submit.
Your new information is submitted to Onyx who will review it and approve it. When all is correctly setup and approved, you will start receiving your commission payments via bank transfer.
If there is an information mismatch, you will be asked to provide additional information.